How to Drill into a Bar Chart Using Sets in Tableau

There are many times when we create a view that makes our users want to dive deeper into the data for more insight. Getting to the level of detail they want can sometimes lead to an overload of information. How can we better manage the ability to provide that detail while keeping a view concise? Maybe we decide to create separate views that add more context as you move through, maybe we utilize crosstabs or highlight tables, or maybe we fall back on hierarchies in Tableau for drill down capabilities.
All of those options have their own pros and cons, but I recently engineered a new solution that fit the bill perfectly. It allowed me to have everything on one view, I was able to avoid crosstabs, and I didn’t have to train users to search for the plus sign for the hierarchy functionality. In this tutorial, I will show you how to create a bar chart that you can drill into using Set actions in Tableau. As an added bonus, I will show you two different ways to implement this functionality.
How to Drill into a Single Row in Tableau

To set up my use case I want to be able to drill down from Region to Category to Sub-Category. As I work through the tutorial, know that if you want to drill down further you can repeat the same steps and continue to drill as far down as you want.
![]()
Creating the first drilldown
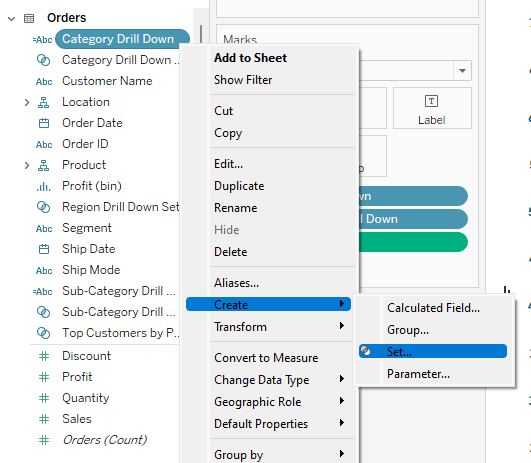
The first thing we need to do is create a Set using the Region dimension. To do this I will right-click on Region, navigate to Create, and Select Set.
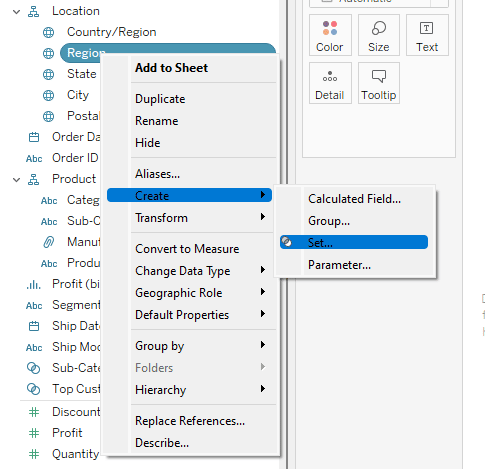
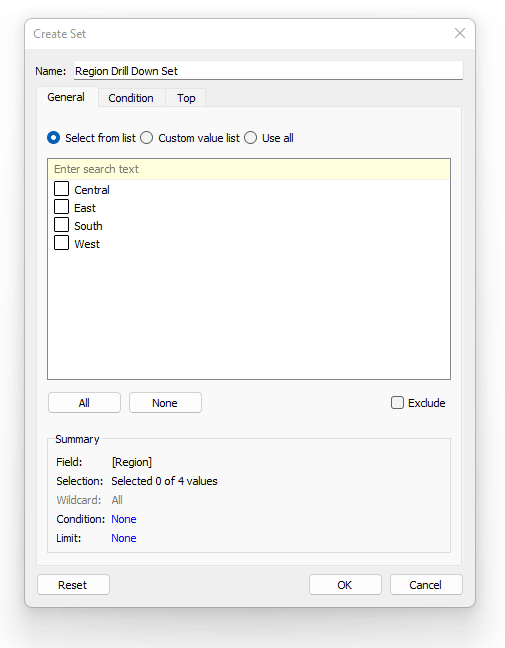
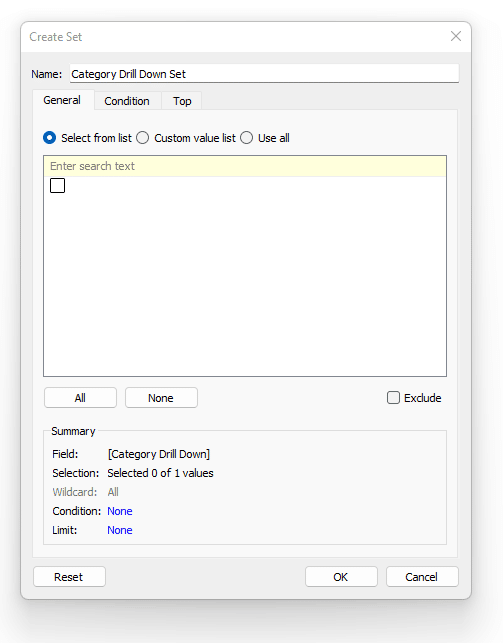
That will open a Create Set menu pane. I will change the name of the set to Region Drill Down Set. I will leave nothing selected for now and simply click OK to create the Set and close the menu.
Category drill down calc
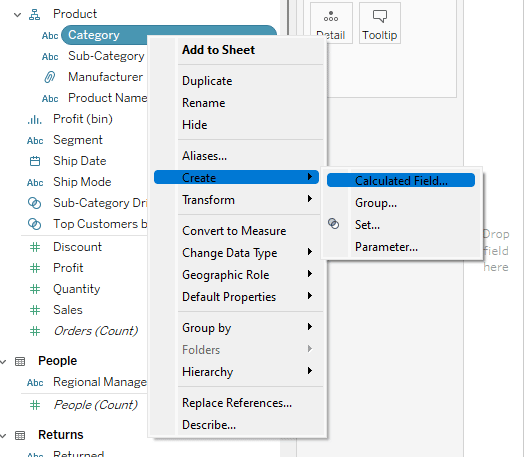
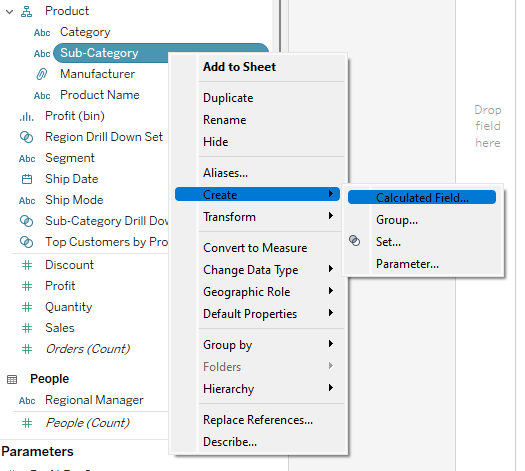
The next step is to create the calculated fields that will ultimately pass the Set values and create that drill down functionality. To create the Category calculated field I will right-click Category, navigate to Create, then select Calculated Field.
Continue reading with a free account, or login.
Unlock this tutorial and hundreds of other free visual analytics resources from our expert team.
Already have an account? Sign In
By continuing, you agree to our Terms of Use and Privacy Policy.
In the Create Calculated Field Menu I will enter the following calculation and name this field Category Drill Down.
IIF([Region Drill Down Set],[Category],”)
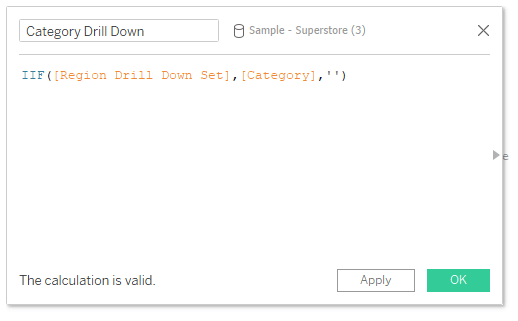
This calculation is using an IIF function. IIF stands for an Immediate IF. If I were to read this like a sentence it would read IF a Region is in the Region Drill Down Set THEN return the Category Dimension ELSE return nothing.
Creating the second drilldown
Category set
The next thing we need to do is create a Set using the newly created Category Drill Down calculated field. To do this I will right-click on Category Drill Down, navigate to Create, and Select Set.
You will notice when creating this set that there are no options to select. If you recall from the Category Drill Down calculated field, it’s set up to return a Category when a Region is added to the Region Set. Right now that set is empty so it is returning a NULL so this is exactly what we want to see. Leave the selection blank and click OK to create the set and close the menu.
Sub-category drill down calc
The next Calculated Field I will create is to drill from Category to Sub-Category. I will right-click on Sub-Category, navigate to create, then select Calculated Field.
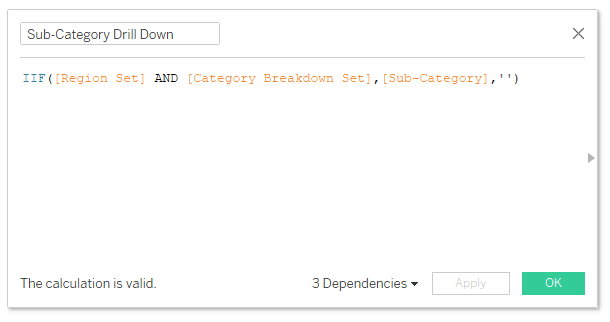
This will open the menu to create the calculated field. I will title this Sub-Category Drill Down and enter the following calculation.
IIF([Region Drill Down Set] AND [Category Drill Down Set],[Sub-Category],”)
With that we are ready to set up our view.
Creating the view in Tableau
Drill down using a stacked bar
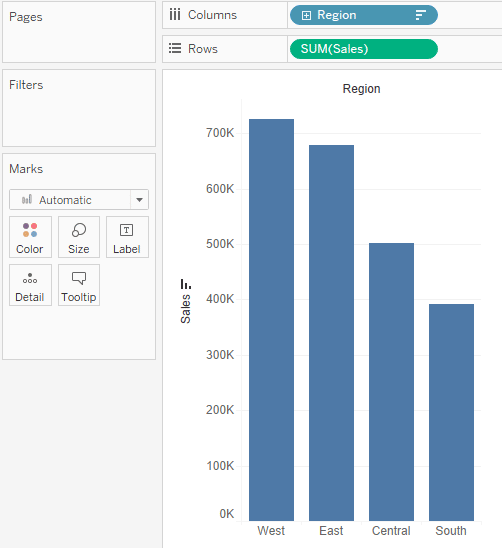
To create the first view, I will start by dragging Region to the columns shelf and Sales to the rows shelf.
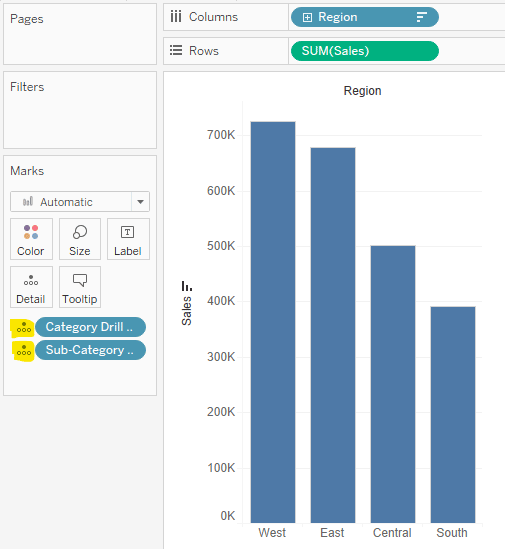
Now we need to add in our drill down calculated fields, so to do this I will drag them both to the Details Marks card.
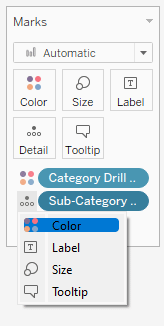
In the above screenshot notice I highlighted the details icon to the left of the pills for our calculated fields. The next step is to click on that icon and change it to Color for both of them.
That is going to add a dual discrete color palette to the view. With that, our view is set up and ready to go. I am going to clean up some of the labels, fonts, and marks in the view and then add it to a dashboard.
How to drill down using multiple bars
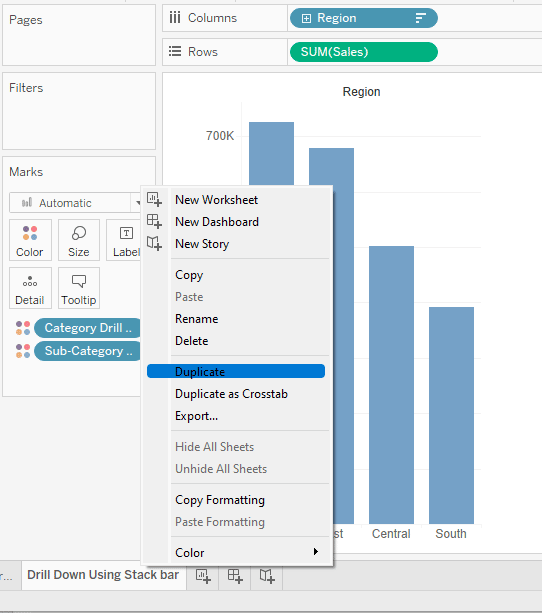
To create my second view, I am going to start by duplicating the first one. To do this right-click on the sheet in the toolbar at the bottom of the authoring interface then select Duplicate.
In the new sheet I am going to drag Category Drill Down and Sub-Category Drill Down into the columns shelf. For now we will not see anything change.
I will clean up that view and add it to the same dashboard as the first view.
How to create dashboard set actions
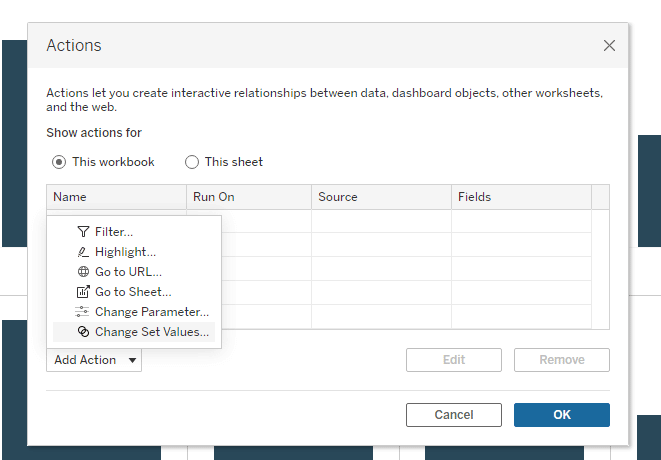
Time to add the Dashboard Set Actions that will allow the user to click on a bar and drill in for further detail. To get started I will click on Dashboard in the top navigation and select Actions

In the Actions Menu I am going to click on Add Action and select Change Set Values
This will open the Add Set Action menu. In this menu I will change the name to Region Drill Down Set Action and select both of my sheets in the source sheets section. I will then choose the Region Drill Down Set in the Target Set dropdown and update the radio buttons at the bottom. My final selections will look like this.
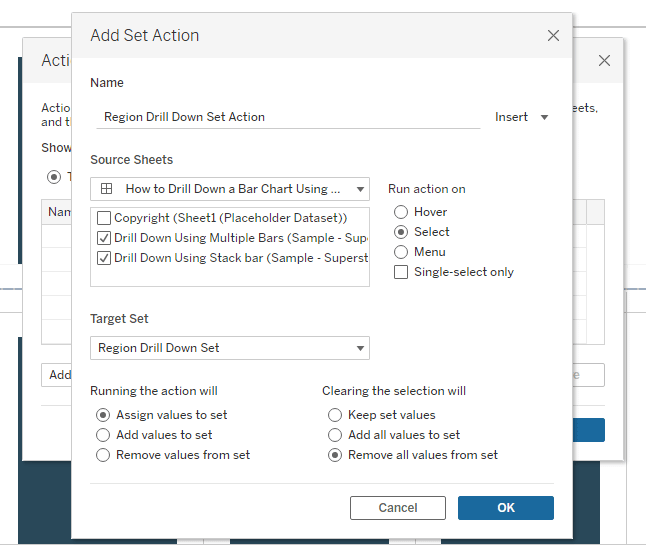
I will click OK, closing the Add Set Action menu. Then I will click Add Action again and choose Change Set Value.
![]()
For my second set, I will repeat the same steps as above except this time I will target the Category Drill Down Set in the Target Set dropdown. I will close this menu by clicking OK.

We can see both actions setup in the Actions menu. I will confirm my actions by clicking OK again, closing the Actions menu.
An Introduction to Tableau Sets
Creating those Set Actions will allow the user to click on either of the views to drill into the detail. You should be left with functionality like the GIF below.
Until Next Time,
Ethan Lang
Director, Analytics Engineering
[email protected]

Written By
Ethan Lang
Related Content
How to Drill into a Single Row of a Text Table in Tableau
Have you ever wanted to drill down into a single row of a text table in Tableau? Tableau has some…
The Definitive Guide to Tableau Sets
In this post you will learn how to: (1) create static Tableau sets, (2) create dynamic sets, (3) use sets…

Ryan Sleeper
Reveal New Insights by Creating Customized Segments and User Experiences You’ll learn how to: (1) create static sets, (2) create…