How to Remove Duplicates in Tableau Prep

One of the most common data cleaning issues after joining or unioning data is duplicate rows. Without deduplicating rows, you run the risk of unintentionally showing inflated numbers. Whether they are exact duplicates or similar rows that need to be condensed, Tableau Prep’s relatively new ‘Identify Duplicate Rows’ feature can remove and consolidate the duplicates with just a few clicks.
Using the Identify Duplicate Rows feature
Identify Duplicate Rows was added to Tableau Prep in version 2024.1. Before this release, searching for duplicate rows included complicated partition calculations, or extra aggregation steps to count rows. For this tutorial, I’ll use a modified copy of the Sample Superstore data set where some duplicate rows have been introduced. Let’s use Identify Duplicate Rows to find those copied records.
![]()
Continue reading with a free account, or login.
Unlock this tutorial and hundreds of other free visual analytics resources from our expert team.
Already have an account? Sign In
By continuing, you agree to our Terms of Use and Privacy Policy.
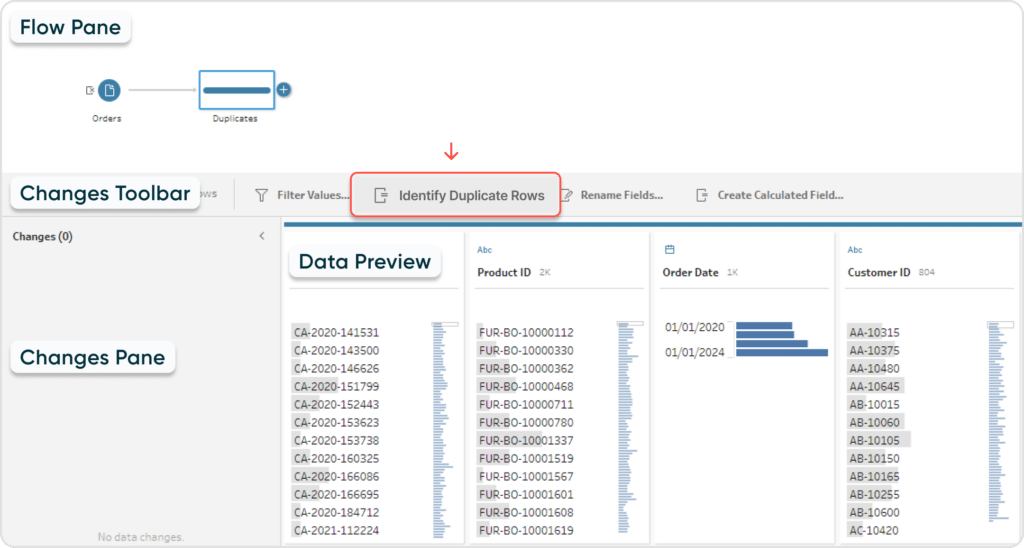
After connecting the data, drag the table onto the canvas. Add a Clean step by clicking the plus (+) icon next to it in the Flow pane. You’ll see a data preview and you can find the Identify Duplicate Rows button in the toolbar above the table preview.
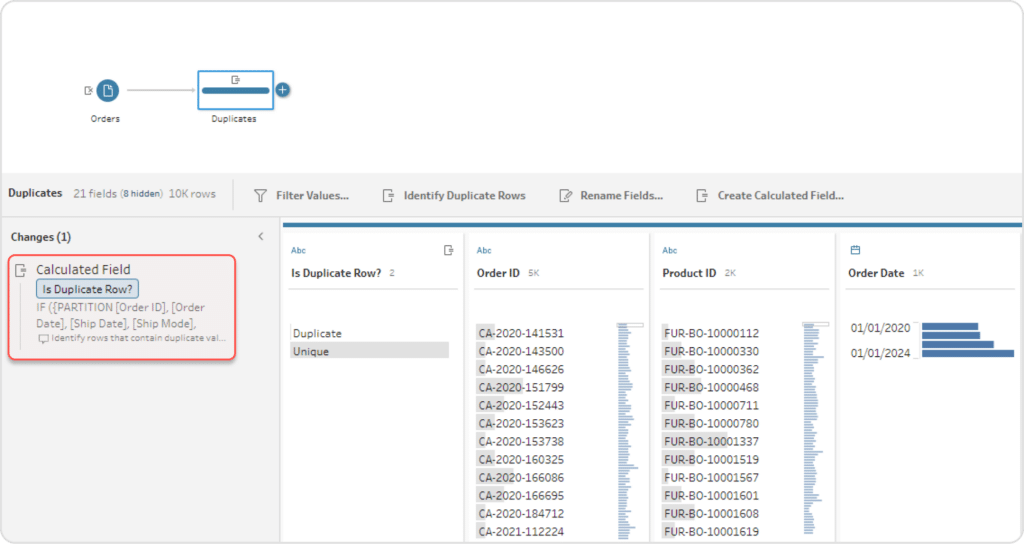
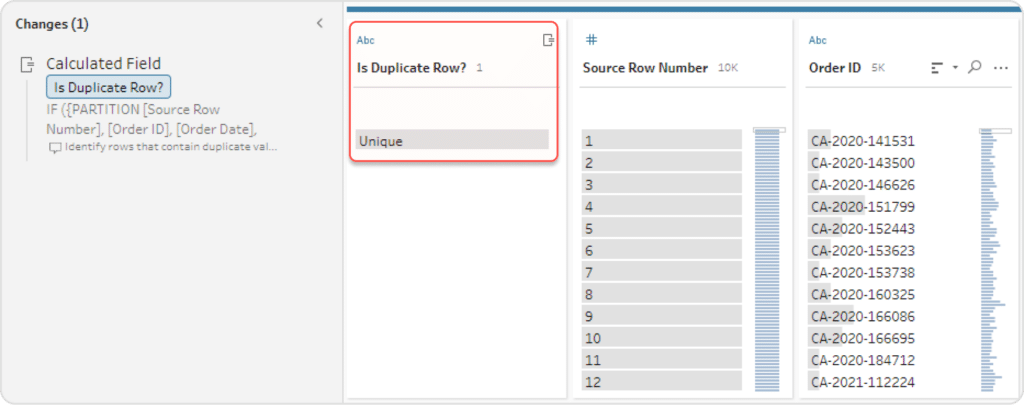
Clicking Identify Duplicate Rows automatically generates a calculated field called ‘Is Duplicate Row’ that identifies the copies. It will show up in the Changes pane where you can track your actions. If not visible, expand the Changes pane by clicking the arrow to the left of the table preview.
Removing duplicate rows from the data
The ‘Is Duplicate Row’ calculation returns ‘Unique’ for just one copy of the row.
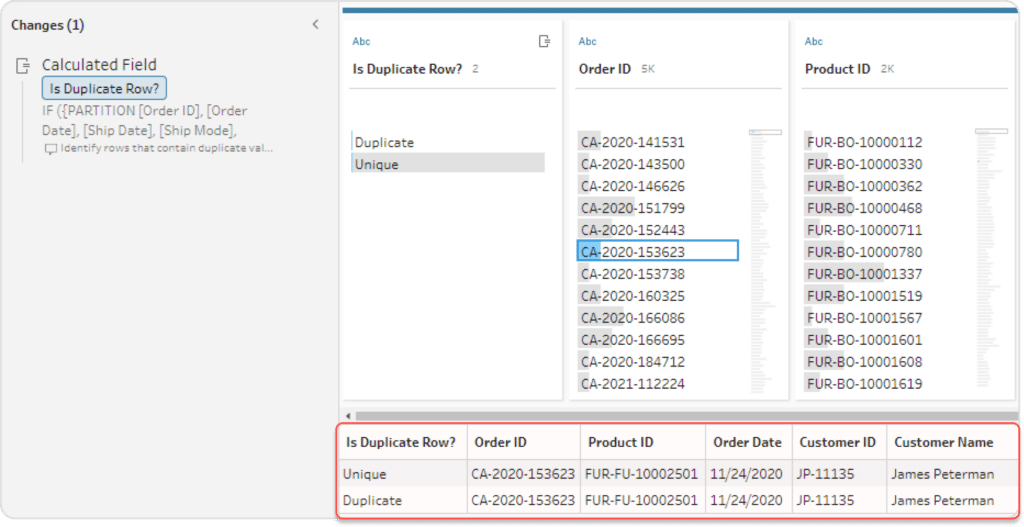
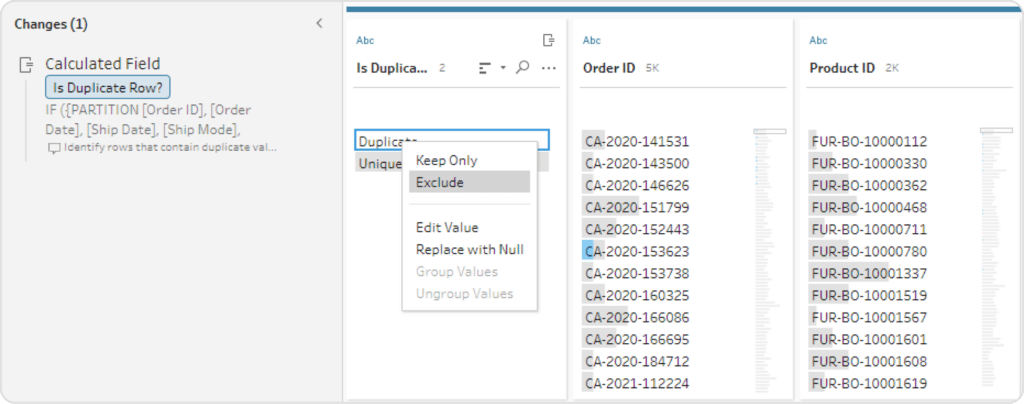
This means that filtering out the records flagged as duplicates will keep a single copy of each record, resolving the duplication issue. To create this filter, simply select the Duplicate value from the Is Duplicate Row field and then select Exclude.
Customizing the “Is Duplicate Row?” calculation
So, what if your duplicate rows aren’t exact duplicates? Let’s add the automatically generated Source Row to this data source. To add it, click the table in your Flow pane and, in the Field Preview, double-click on Source Row and choose Include Field.
This time, clicking Identify Duplicate Rows doesn’t find any copied records because each record has a distinct Source Row value.
Instead, we can select Order ID, Product ID, and Quantity before clicking Identify Duplicate Rows. This will generate a version of the Is Duplicate Rows calculation that ignores the unselected rows. This version will ignore the Source Row column and find the duplicate rows.
![]()
Alternatively, we can edit the calculated field directly by double-clicking it in the Changes pane. Deleting Source Row from the Partition clause makes the calculation ignore it and find duplicate rows as if that field did not exist.
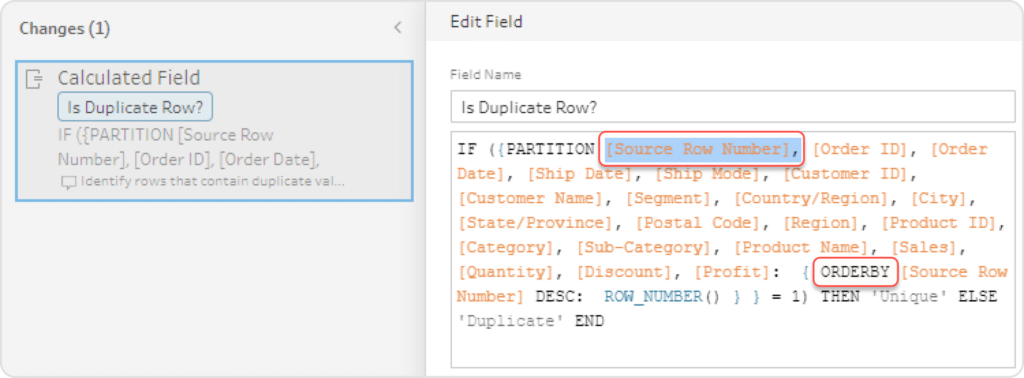
If you need to keep the earliest or most recent record, you can control which row is flagged as unique by modifying the ORDERBY clause. To do this, change the field after ORDERBY and choose DESC or ASC to specify the sort order.
While it was possible to perform these tasks manually before the Identify Duplicate Rows feature, the new feature makes it a lot easier! I hope this tutorial has helped you understand how it works and the possibilities it unlocks in Tableau Prep.
Thanks for reading!
Felicia

Written By
Felicia Styer

Peer Review
Rafael Simancas
Sr. Manager, Brand Strategy
Related Content
Bringing Tables Together: Tableau Relationships
This is part two in a series on combining data tables together for analysis in Tableau. Other posts in this…
A Quick Start Guide to Tableau Prep

In this tutorial, we’ll be covering the Tableau Prep tool and how we can use it to build out data…

Ryan Sleeper
Avoid inflated numbers with this simple level of detail calculation Combining data sources with a join or union is a…