3 More Ways to Make Charming Crosstabs in Tableau

One of the most challenging aspects of data visualization can be getting stakeholders to buy into using something other than spreadsheets. Despite the growth in number and capabilities for visualization tools, there are still some stakeholders who just want a good ol’ fashioned crosstab (text table). So what’s a data vizzer to do? As Ryan Sleeper mentioned in a previous post on crosstabs in Tableau, they just don’t take advantage of preattentive attributes. In that post, he demonstrated three ways to improve the engagement and effectiveness of your tables, which can help nudge reluctant stakeholders away from spreadsheets and towards true data visualizations.
Expanding upon Ryan’s previous post, I’m sharing three more ways you can upgrade your text tables in Tableau to help move your stakeholders into a data visualization mindset. By the end of this post, you’ll be able to build three unique crosstabs that will increase the engagement and stakeholder adoption of data visualizations. Let’s get started!
Tips for Formatting Text Tables in Tableau
Update time series crosstabs in Tableau
The crosstab below is a classic example of a request I’ve seen many times throughout my career. The stakeholder wants to see sales over time broken down by a few dimensions. They also want to know which quarters hit the sales goal, and since this table doesn’t show that, a paragraph summarizing the findings will do the trick. Sound familiar?
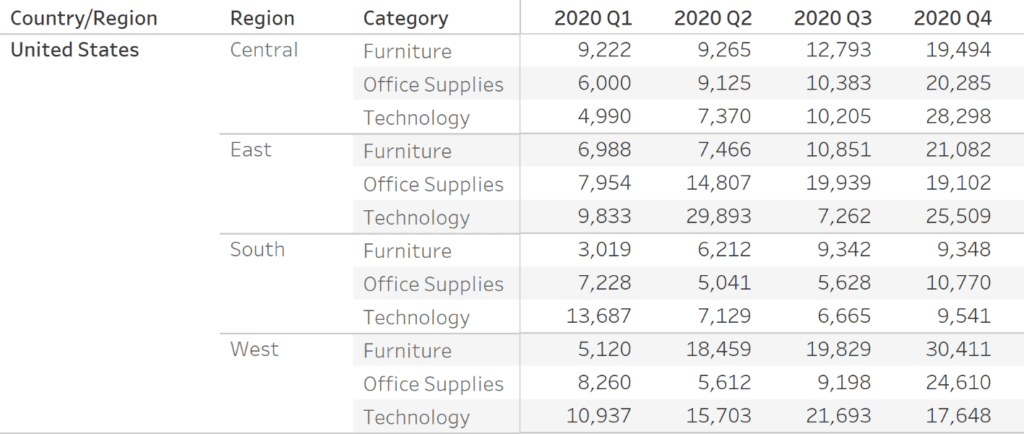
I like to ask myself what is important to the stakeholder here. Do they really need to know that Technology had $15,703 in sales for the West in Q1 2020? Or are they looking for regions and categories that are either consistently or maybe never hitting sales goals?
![]()
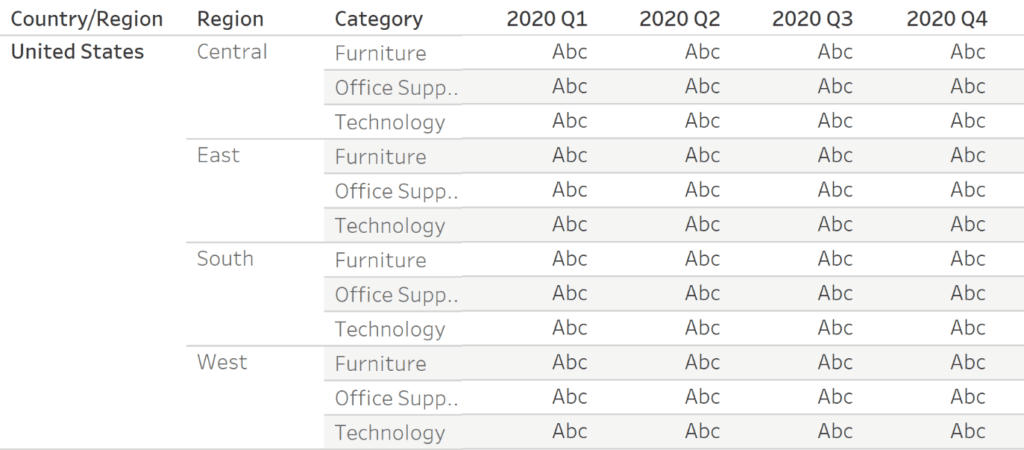
To upgrade this crosstab to one that makes the sales goal aspect apparent, we’ll start with a very similar setup. Connect to the Sample Superstore dataset in Tableau. Add Country/Region, Region, and Category to the Rows shelf. Add quarter of Order Date onto the Columns shelf, and make sure it’s set to Discrete. This shifts the column labels to the top of the table and makes it easier to read. You should have a view like this:
Continue reading with a free account, or login.
Unlock this tutorial and hundreds of other free visual analytics resources from our expert team.
Already have an account? Sign In
By continuing, you agree to our Terms of Use and Privacy Policy.
Next we’ll set up a sales goal. For the purposes of this example, we’re going to set the sales goal at $10,000 for every region, category, and quarter. My calculated field looks like this:
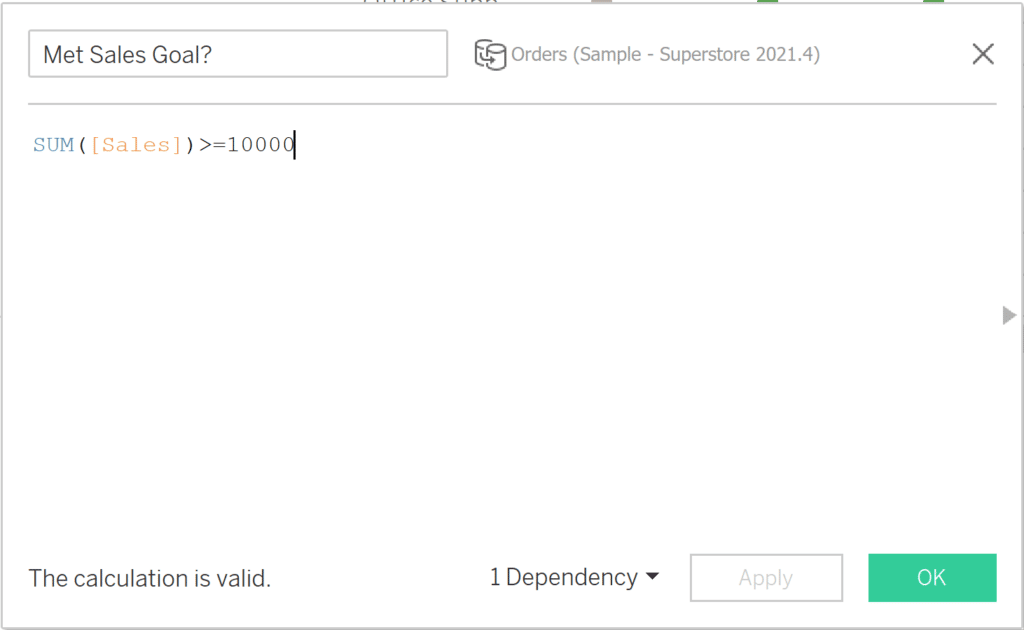
SUM([Sales])>=10000
Now let’s bring the shapes in. On the Marks card, change the Mark type from Automatic to Circle. Drag and drop the Met Sales Goal calculation onto the Color property of the Marks card. Set the colors according to what you want to highlight. I decided to highlight the quarters where the sales goal was met, so I set True as a bright green and False as a light gray. To round out this viz, I added Sales to the Tooltip and cleaned it up a bit. Here’s my final view:

It’s now readily apparent that all but two regions and categories hit the sales goal in the final quarter of 2020, and the Technology category in the West region hit the goal every quarter. The time to insight is a lot faster than the original crosstab, and can act as a springboard for further analysis.
Add custom shapes to show a status
My next example comes from an analysis common in the retail or supply chain industries – asking the latest status related to a product. Was it shipped on time, is it in use, is it on the shelf in a store? Where do we need to increase inventory? I created a mock dataset to show the products by department and their stock status for the fictional chain Playfair Grocery. Here’s the crosstab I’m starting with (you can download the Tableau workbook on this page to follow along):
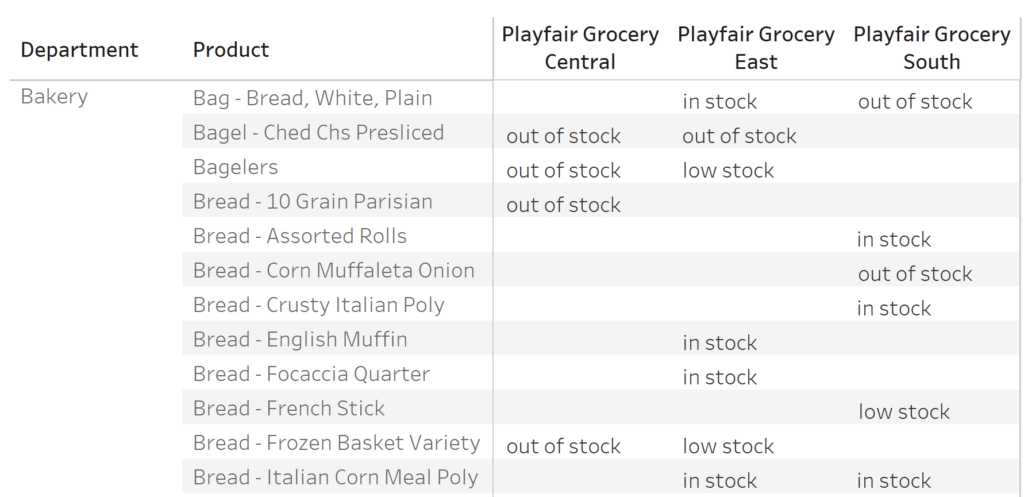
Again, we see that without the use of any preattentive attributes, it’s hard to glean any useful information.
To start this visual, place Grocery Store on the Columns shelf, and Department and Product on the Rows shelf. Change the Mark type from Automatic to Shape. Drag Product Status onto the Shapes property of the Marks card.
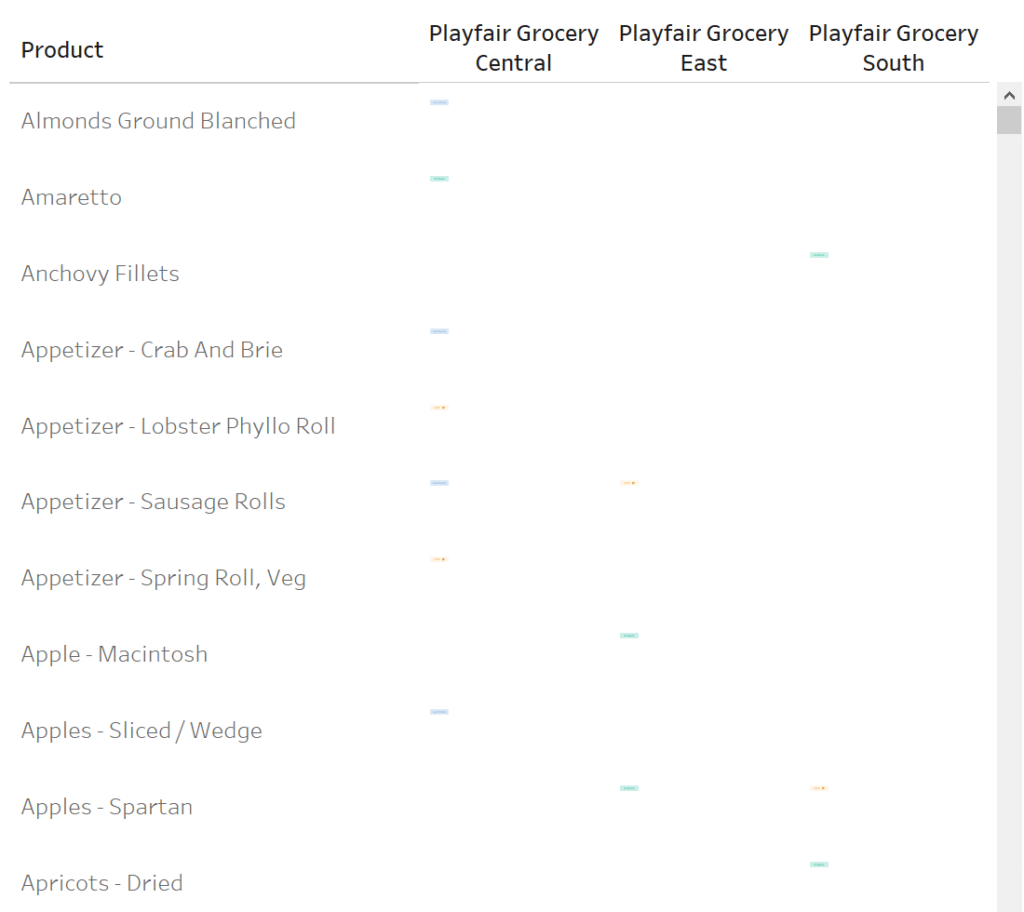
When it comes to the shapes, I created custom indicators for in stock, low stock, and out of stock (OOS) in Figma, but you can use whatever tools you have available. Here are my custom shapes:
Once your shapes are added to the Shapes folder in your Tableau Repository, you can assign the shapes in your crosstab. It will look something like this:
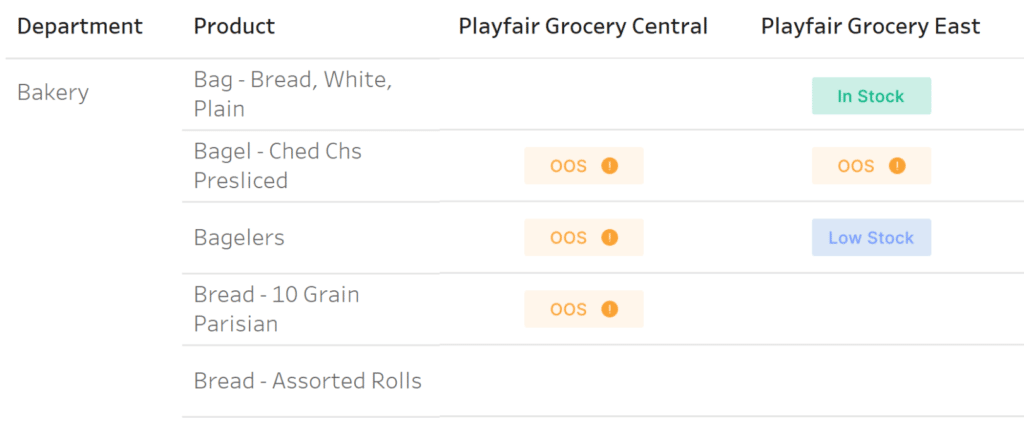
Our view isn’t quite finished. First, resize the shapes so that they are legible. Next, I have a simple trick that lets you center the shapes in each column. Double click in the Columns shelf and type MIN(0). Hide your header and gridlines, and ta da! You have centered shapes that are the appropriate size. My final view looks like this:
How to Make Indicators with Custom Shape Palettes in Tableau
Use images instead of text headers
The third and final option is more about adding some pizzazz to your dashboard than utilizing preattentive attributes to improve a crosstab. Instead of using text to head our table’s columns, we’re going to use images/shapes instead. It’s a simple but effective way to add some visual interest, and is applicable across industries and dashboard uses.
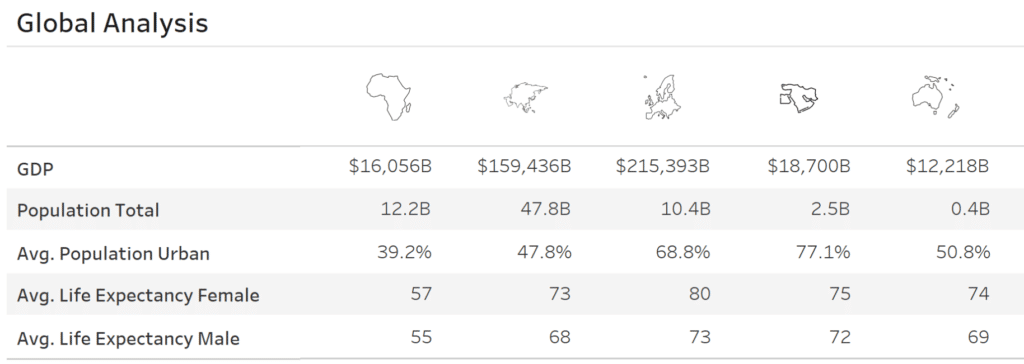
Let’s say we have this simple crosstab with data from the World Indicators dataset. Region is on the Columns shelf and Measure Names is on the Rows shelf. Measure Values are on the Text property of the Marks card. You can use whatever measures you like in your crosstab, but here’s what mine looks like:

To create the image header, simply choose an image for each of the column headers in your table. For mine, I created a new sheet, placed Region on the Columns shelf and the Text property, assigned the appropriate shapes, hid the headers, and removed the row dividers. (Hint: make sure your column headers are in the same order on both sheets.)

To combine your image header with your crosstab, you can either float your sheets on a dashboard, or you can use containers. I chose to use containers. First I added a Vertical container and added my crosstab with the text headers removed.
![]()
Next, I added a Horizontal container within the Vertical container. Add the Image Header sheet to the horizontal container, then add a Blank object to the left side of the same container to ensure the images line up with the appropriate column. The entire view should look like this:
And that’s it! Three more ways you can create charming crosstabs (and hopefully sway your stakeholders towards more viz options in the process!). Thanks for reading!
Happy vizzing,
Alyssa


Written By
Alyssa Huff

Peer Review & Graphic Design
Dan Bunker
Manager, Decision Engineering
Related Content
Playfair Data Presents: Preattentive Attributes
In the post and video, Why do you visualize data?, I share my exercise for educating stakeholders on the value…
3 Ways to Create Charming Crosstabs in Tableau
I’ve explained before that a spreadsheet is not a data visualization because it does not take advantage of any pre-attentive…

Ryan Sleeper
Improve on the ‘gateway’ chart to data visualization Highlight tables help smooth the Excel transition by introducing the preattentive attribute…