How to Drill into a Single Row of a Text Table in Tableau
Have you ever wanted to drill down into a single row of a text table in Tableau? Tableau has some nice hierarchy options that allow you to drill down and back up to get varying levels of detail for whatever you are analyzing, but the drilldowns are all or nothing. So, by default, if you wanted to click on a Category dimension member to reveal each category’s respective sub-categories, all the categories will display their sub-categories.
This default behavior becomes problematic with text tables because the number of rows gets inflated with data irrelevant to your analysis. This post will show you the three-step solution for drilling into a single dimension member to reveal underlying detail in Tableau.
This content is excerpted from my book, Innovative Tableau: 100 More Tips, Tutorials, and Strategies, published by O’Reilly Media Inc., 2020, ISBN: 978-1492075653. Get the book at Amazon.
How to Drill into a Single Row in Tableau
Set actions vs. parameter actions
The trick to clicking into a single row to expand to more detail involves either set actions (available as of Desktop 2018.3) or parameter actions (available as of Desktop 2019.2). Set actions are more flexible than parameter actions because 1. they allow you to do a multi-select (i.e. drill into one or more rows), 2. you can use empty sets (parameters always have a current value selected), and 3. you can tell Tableau what to do when a selection is cleared. For these reasons, we will set up our drilldown using sets.
For this illustration, let’s pretend we are using this table that looks at Sales, Profit Ratio, and Discount by Category from the Sample – Superstore dataset. We would like to drill into individual categories to reveal the Sub-Category dimension for only the selected category.

Create the drill down set in Tableau
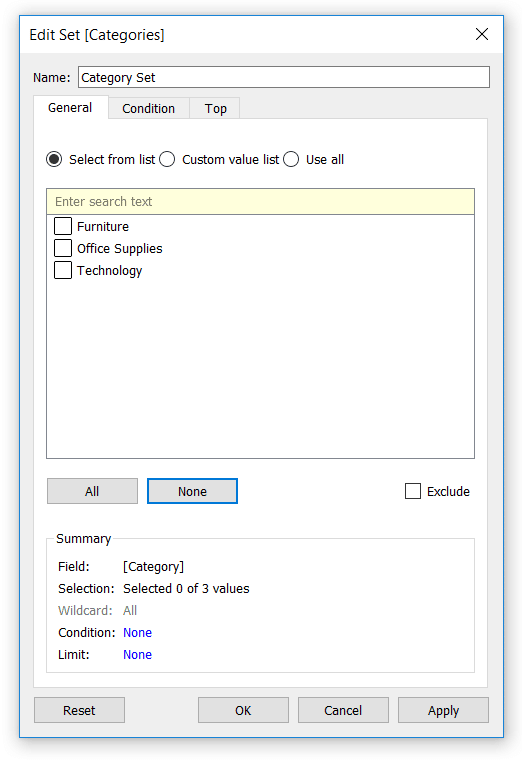
The first step is to create a set from the dimension you will be clicking on to reveal more detail. To create a set, right-click on the dimension (Category in this case) in the Dimensions area of the Data Pane, hover over Create, and choose “Set…”. Leave the set blank for now, as we will be populating the set during the third step.
An Introduction to Tableau Sets
Create the IIF calculated field
Next, create a calculated field that will display the second level of the hierarchy only when the first level of the hierarchy is in the set.
Create a free account, or login.
Unlock this tutorial and hundreds of other free visual analytics resources from our expert team.
Already have an account? Sign In
For this example, I want to display the Sub-Category dimension (i.e. the second level of the hierarchy) when a dimension member from the Category dimension is in the set. The most elegant way I can think to write this formula is:
IIF([Category Set],[Sub-Category], “”)
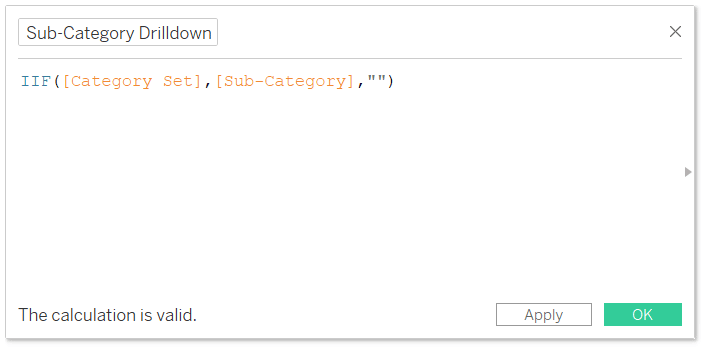
The Immediate IF function looks at the logic before the first comma; when the statement is true, it displays the outcome between the first and second comma; when the statement is false, it displays the outcome after the second comma. Since sets are Boolean, the Category Set from step one alone is a logical statement; it’s essentially a more elegant way to say “IF a Category dimension member matches the dimension member in the set THEN show the Sub-Category dimension ELSE show a blank END”.
I will now place this newly created calculated field onto the Rows Shelf of my table.
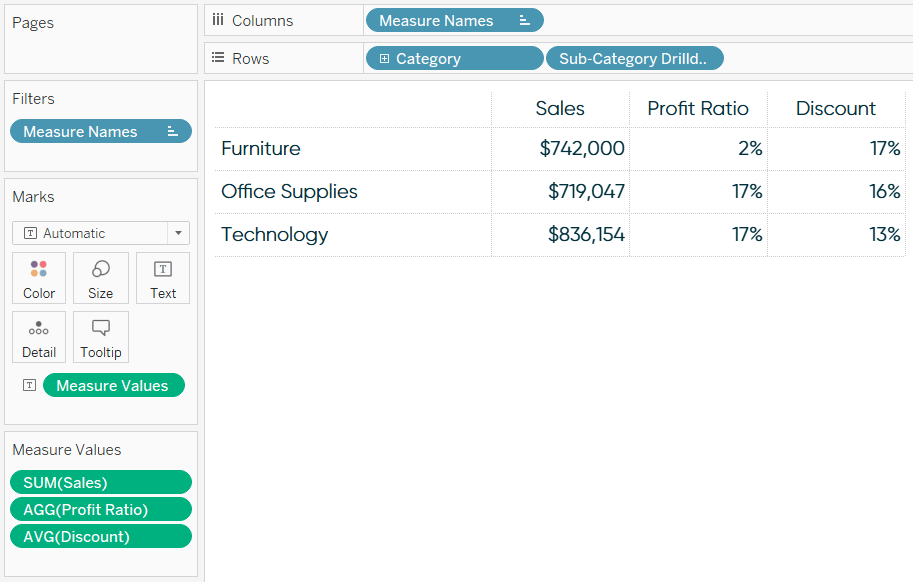
Nothing changed because our Category Set is currently empty, and the Sub-Category dimension will only be displayed if a dimension member from the Category dimension matches a dimension member in the set we created in the first step.
Populate the drill down set using dashboard actions in Tableau
In the third and final step, we will use a set dashboard action to populate the Category Set, which will create the single-row drilldown effect. To create a dashboard action, the sheet has to be on a dashboard, so I’ve thrown the Text Table sheet containing my Category and Sub-Category Drilldown dimensions on a new dashboard.
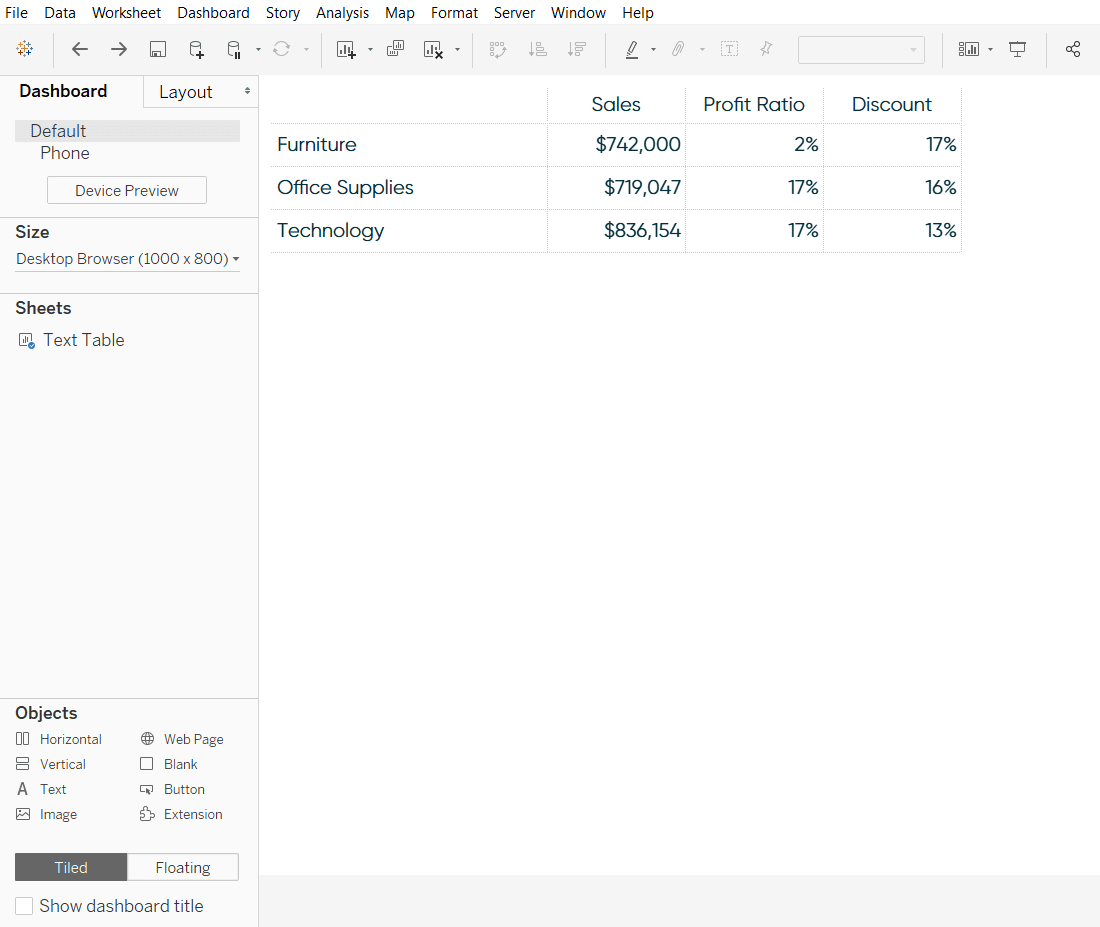
To create a set action, (1) click Dashboard in the top navigation, (2) click “Actions…” from the list of options, and (3) choose “Change Set Values…”.
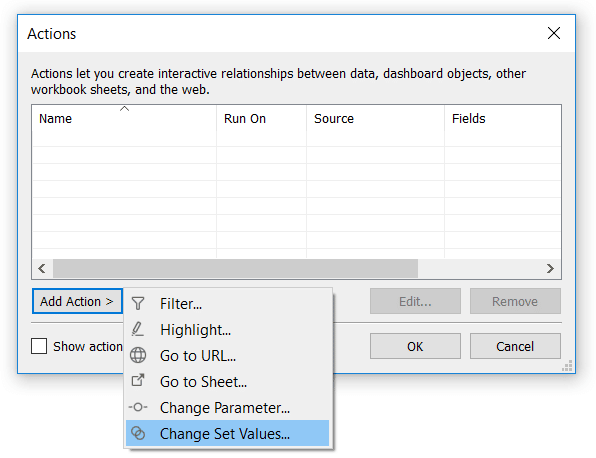
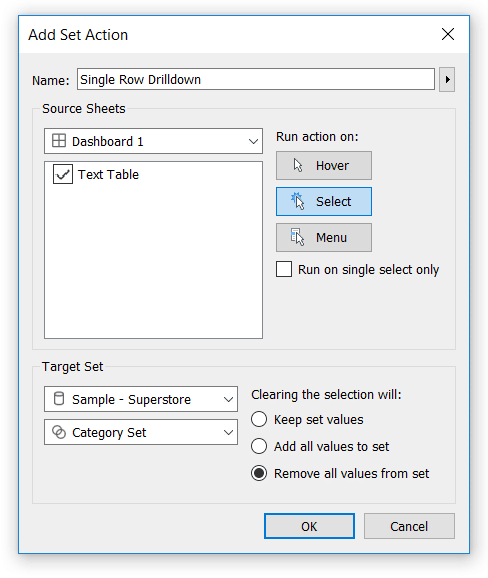
The most important aspect of the Change Set Values dashboard action settings are to tell Tableau which set you are targeting, but you can also set up when you want the action to execute and what you want to happen when the selection is cleared.
For this use case, I recommend having the action run on “Select” and “Removing all values from set” when the selection is cleared. This means the single row drilldown will work when a user clicks on a dimension member and the table will go back as if nothing happened when the selection is cleared.
An Introduction to Tableau Dashboard Actions
Now if a user clicks on a specific dimension member, such as the Office Supplies category, the table will drill into the sub-categories for that single row.
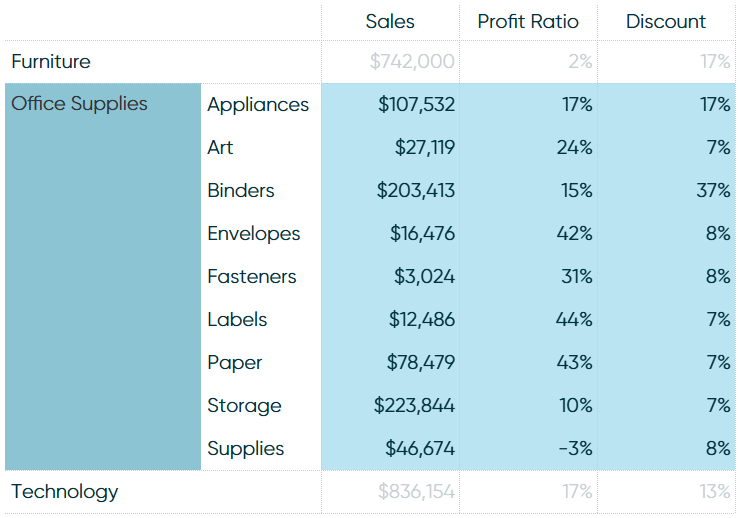
When they clear the selection by clicking somewhere else on the view or the Escape key, the table returns to its default state with no sub-category detail.

In the case that you want to drill into individual rows at the same time, this approach also works with a multi-select by holding the Control key while you click on multiple dimension members. By the way, this works any time the Category, or whatever dimension you are analyzing, is on the view – so it will also work on visualizations.
For more ways to get the most out of text in Tableau, read the related post, 10 Tableau Text Tips in Ten Minutes.
Thanks for reading,
– Ryan
Related Content
Tableau Tip: Single Row Drilldown “Deluxe”
I’ve shown you before how to drill into a single row of a Tableau crosstab. I find this to be…
How to Drill into a Bar Chart Using Sets in Tableau
There are many times when we create a view that makes our users want to dive deeper into the data…
Ryan Sleeper
Help your audience evolve from spreadsheets to data visualizations How to convert a text table to a highlight table, leverage…

