Tableau 201: How to Dynamically Format Numbers
One of my favorite tricks in Tableau is to provide the ability for myself and my end users to choose which dimension or measure is displayed on a view. This user experience is provided by setting up a parameter with the options and then creating a calculated field that tells Tableau what to display when each option is selected. The parameter approach to dimension and measure display has two huge benefits: 1. It puts the power of the analysis into the hands of end users, which allows discovery, and 2. It saves valuable real estate on a dashboard by displaying only what is selected.
However, there is one big drawback to dynamically displaying measures: number formats. To produce the user experience described, a calculated measure must be created, and calculated measures can only have one number format. This is problematic if you are allowing your end users to choose between measures that have varying number formats, such as integer, percent, and/or currency. Having one shared number format across all of the measure options is usually not a deal breaker, but wouldn’t it be great if you could pick a different number format for each number?
This post shares how to dynamically format measures in Tableau. We will be using the Sample – Superstore dataset to dynamically format the Quantity, Discount, and Sales measures into integer, percent, and currency formats, respectively.

Create a free account, or login.
Unlock this tutorial and hundreds of other free visual analytics resources from our expert team.
Already have an account? Sign In
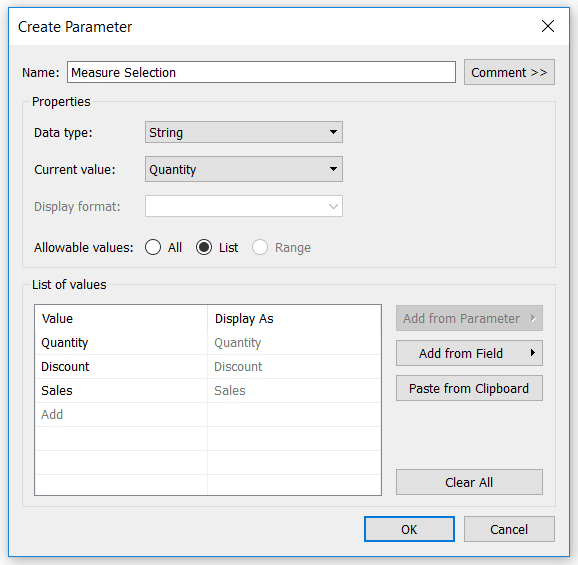
Create a string parameter with the measure options
This is the most flexible approach possible to dynamically formatting numbers in Tableau. It allows you to customize both the prefix and suffix for any measure and works whether the values are negative or positive. To begin, set up a string parameter with the three measure options:
Normalize the measure selected
Next, you have to create a calculated field that tells Tableau how to handle each parameter selection:
Note that in this case, I handled the discount measure differently than quantity and sales. I’ve forced the aggregation to be average and multiplied it by 100 so the decimal moves over two spots to the right (making it easier to read the percentages).
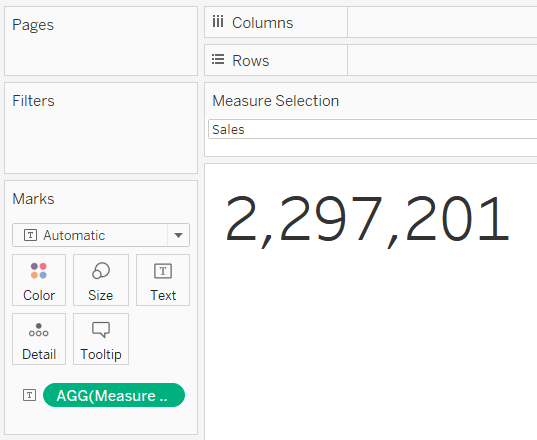
Now whenever this Measure Selected KPI is used in combination with the Measure Selection parameter control – which appears by just right-clicking on it and choosing “Show Parameter Control” – the end user will have the ability to choose between the three measures. This is a great user experience, but look what happens when the Sales measure is selected, for example:
Sales should be in currency format, but there is no dollar sign. That’s because all three measures in our Measure Selected calculated field have to share the same format and, by default, the format is set to automatic. We could change the format to currency, but then a dollar sign would be shown for the Quantity and Discount measures. This same problem happens when the Discount measure is selected because it is the only measure of these three that should display a percent sign.
Format numbers with prefix and suffix calculated fields
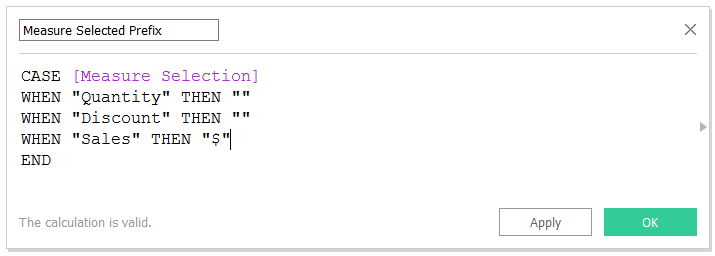
My solution involves setting up two additional calculated fields that are based on the parameter; one for the measure selected prefix, and one for the measure selected suffix. For these three measures, my prefix calculated field would look like this:
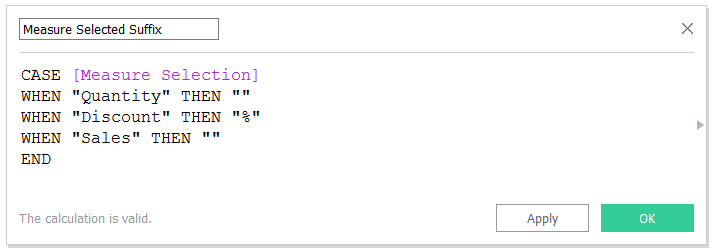
This formula is telling Tableau that if the Sales measure is selected, display a dollar sign; otherwise don’t display anything. Since the Discount measure needs a percent sign added to the end of the number when it is chosen, I will also set up a calculated field for the number suffix:
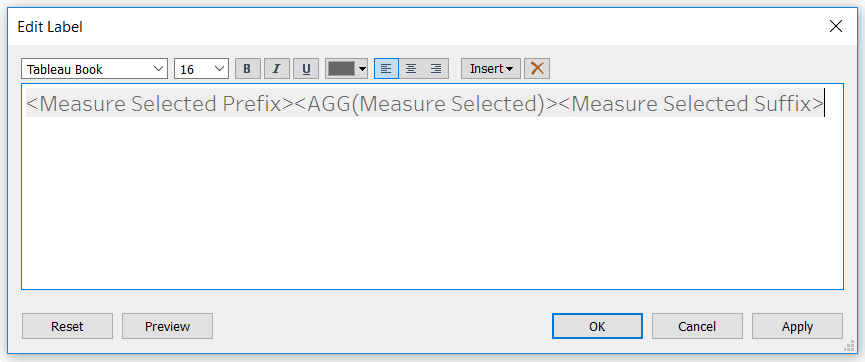
Now I will add both the prefix and suffix calculated fields to the Text Marks Card. After all of the fields needed are on the view, click into the Text Marks Card to edit the order that the fields are displayed. To get the measure selected to display properly with its respective format prefix and suffix, place the prefix calculated field in front of the measure selected field, and the suffix calculated field behind the measure selected field:
An Introduction to the Tableau Marks Shelves / Marks Cards
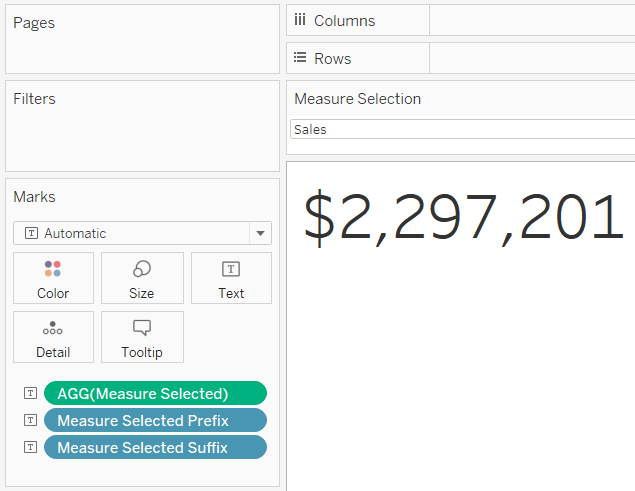
Now when the Sales measure is selected, a dollar sign is shown as the prefix:
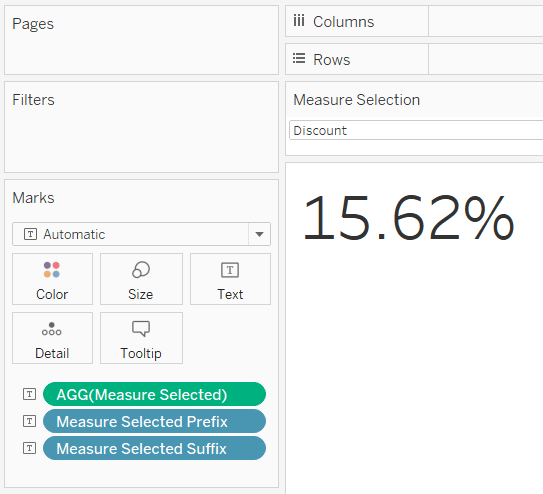
When the Discount measure is selected, the dollar sign goes away and a percent sign is shown as the suffix:
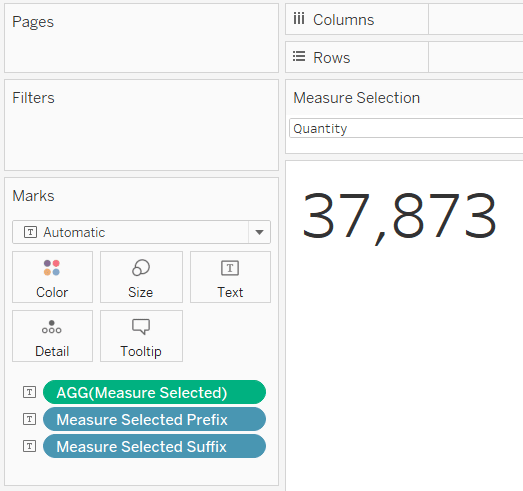
When the Quantity measure is selected, no prefix or suffix is displayed:
We were using a basic view for the purpose of illustration, but this approach works in larger crosstabs, with mark labels, and tooltips.
Thanks for reading,
– Ryan
This content is excerpted from my book Practical Tableau: 100 Tips, Tutorials, and Strategies from a Tableau Zen Master published by O’Reilly Media Inc., 2018, ISBN: 978-1491977316. Get the book at Amazon.
Related Content
3 Ways to Conditionally Format Numbers in Tableau
There are many needs to conditionally format numbers in Tableau. I’ve previously covered how to dynamically change the prefix and…
Ryan Sleeper
Round to Two or Four Decimals Based on Measure Values See how to dynamically round numbers to two decimals when…
How to Dynamically Change Number Units Between K / M / B in Tableau
This post will show you how to automatically change number formatting in Tableau between no units for values less than…

