How to Add a ‘Filter in Use’ Alert to a Tableau Dashboard
As I am constantly touting the benefits of data visualization and Tableau, I regularly have conversations with the objective of helping analysts evolve their reporting from spreadsheets and Excel. It is not that I dislike Excel (though I can’t say the same about spreadsheets as “data visualizations”). I use Excel almost daily and it is an excellent software for preparing and storing data sources that require fewer than Excel’s ~1 million row limit.
Being such a pervasive tool and pioneer in office software, Excel is bound to have a few valuable features that haven’t yet made it into Tableau. Remember when the XFL had the skycam before the NFL made it cool? Orlando Rage – good times. Anyway, one of those features that I really like about Excel that is missing in Tableau is an alert that tells you when a filter is being applied to a dashboard. In fact, Excel tries to give you a heads-up in several ways: (1) a filter icon on the column being filtered (2) a caption in the bottom left corner of the view and (3) highlighted row numbers.
In Tableau, unless a filter is being shown on a dashboard, it’s possible to have no indicators to an end user that the view is filtered. Even when a filter is being shown on a dashboard, the indication that it’s in use is very subtle (i.e. showing the filter selection). When you’re jumping around between descriptive and prescriptive views or if your end user is not experienced in Tableau, it can be easy to lose track of when a filter is being applied. This post shows you a simple four-step solution for adding a ‘filter in use’ alert to a Tableau dashboard.
How to Add a Filter in Use Alert to a Tableau Dashboard
How to add a ‘filter in use’ alert to a Tableau dashboard
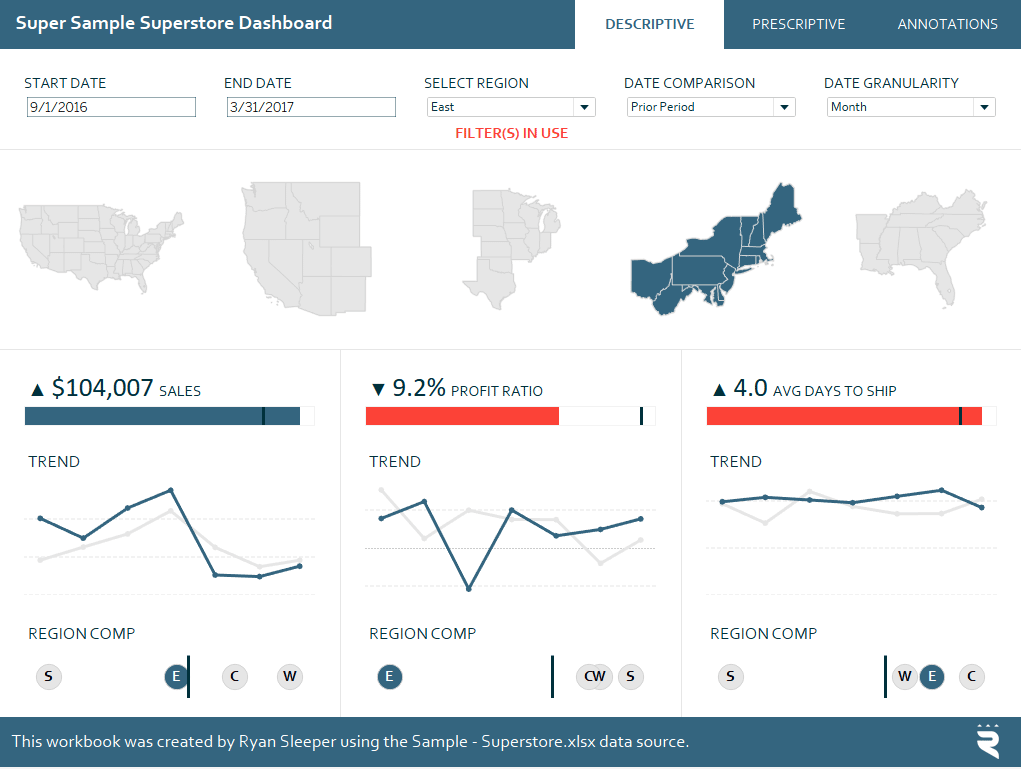
We will be using the Super Sample Superstore dashboard to illustrate this approach. As you can see from this screenshot, when we filter down to a region other than US (which is the unfiltered view), a caption appears alerting the end user (look just beneath the Region filter).
The first step to creating a filter in-use alert is to isolate the total number of records in your dataset. The resulting number will be used to calculate whether a filter is being applied. If the number of records in the view matches the number of records in the entire dataset, no filter is being applied. If the number of records in the view is fewer than the number of records in the entire dataset, a filter is being applied.
Create a free account, or login.
Unlock this tutorial and hundreds of other free visual analytics resources from our expert team.
Already have an account? Sign In
To compute the unfiltered number of records in the dataset, create a calculated field that uses a FIXED level of detail expression. My formula is:
{FIXED: SUM([Number of Records])}
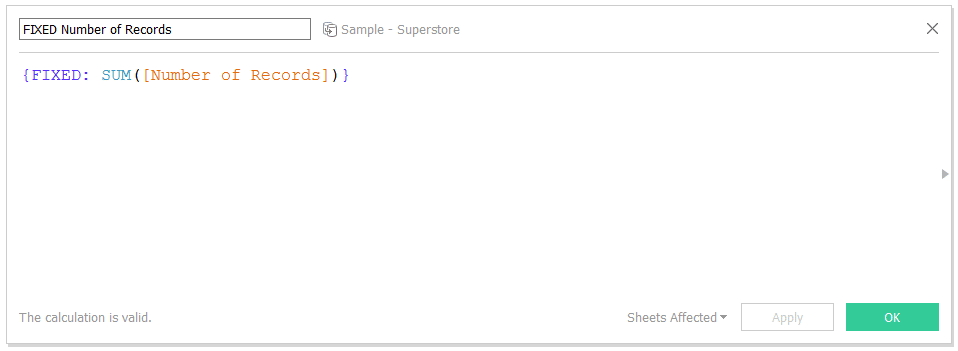
Note that Number of Records is a generated field that will automatically be available for use no matter what data source you are using.
This formula tells Tableau to count the total number of records in the dataset regardless of the filters being applied. One caveat to this is that the record count happens after extract filters, data source filters, and context filters. For a quick introduction on LOD calculations, see Tableau Fundamentals: An Introduction to Level of Detail Expressions.
The next step to creating a filter in use alert is to create a second calculation that computes whether or not the number of records in the view matches the unfiltered number of records. When the two numbers do not match, I want a message to show up that says “FILTER(S) IN USE”. When the two numbers do match, I don’t want anything to show up. My formula is:
IF SUM([Number of Records]) <> SUM([FIXED Number of Records]) THEN “FILTER(S) IN USE”
ELSE “”
END
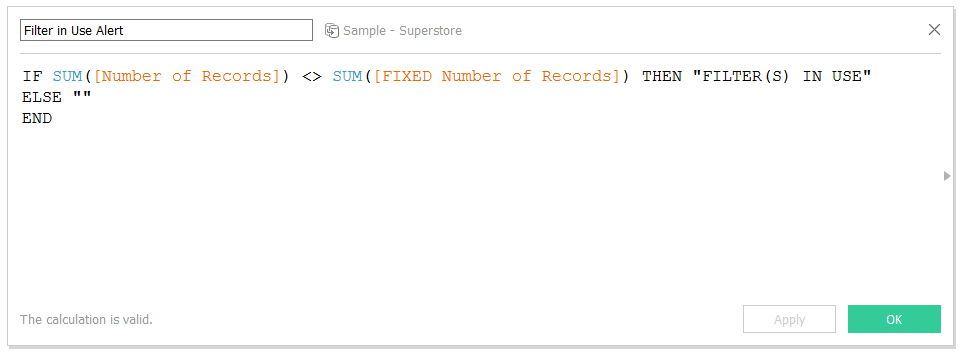
The third step is to create a sheet that contains your “FILTER(S) IN USE” alert. To do so, create a new worksheet, and drag the newly created ‘Filter in Use Alert’ calculated field to the Text Marks Card. You can format the alert to be the color, font, and size of your choosing.
Now the key to the entire tip. To get the ‘Filter in Use Alert’ to properly calculate whether the filtered number of records matches the fixed number of records, ensure that any filter that you want to be included in the alert is applied to this worksheet. To apply a filter to multiple sheets (including the filter in use alert sheet), go to any sheet containing the filter, right-click on the filter (or click the down-arrow that appears when you hover over the filter), hover over ‘Apply to Worksheets’, and click ‘Selected Worksheets…’
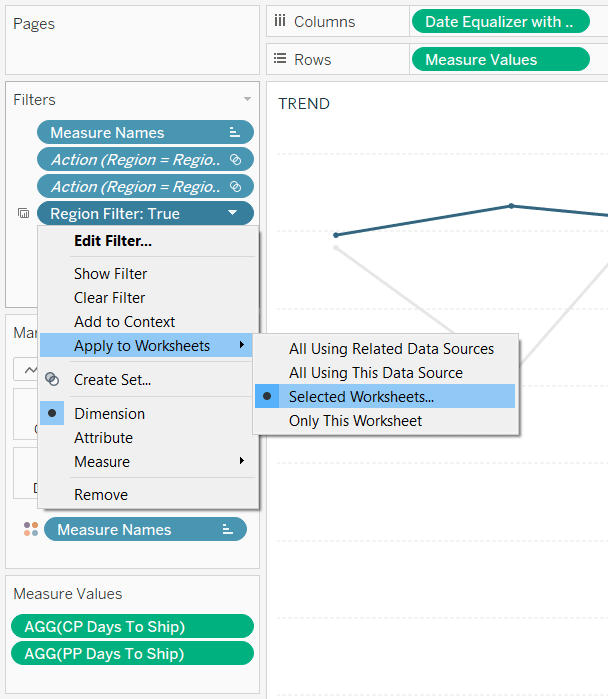
After clicking ‘Selected Worksheets…’, you will be presented with a list of all the worksheets in the workbook, where you can choose to apply the filter to the newly created Filters in Use Alert worksheet.
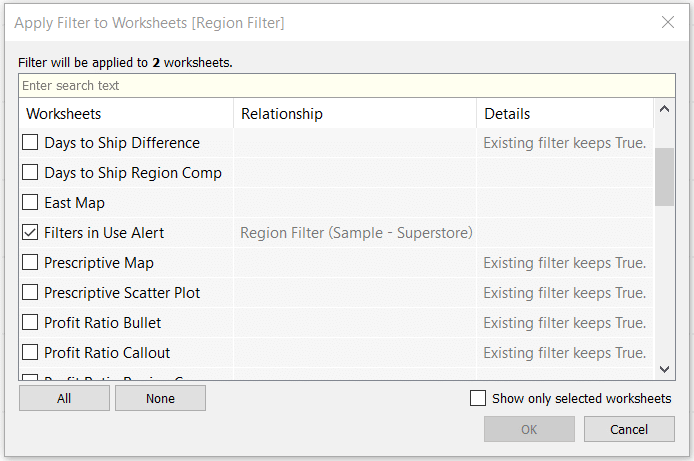
After applying this filter to my Filters in Use Alert sheet, my final view looks like this:
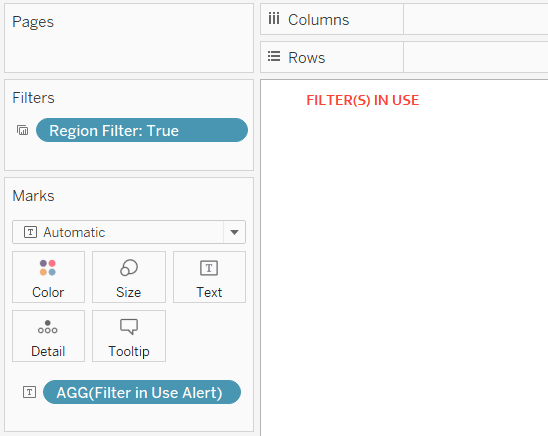
Note that by picking and choosing individual filters to apply to this sheet, you are setting the rules for how rigid the alert will be. In my example, changing the Date filters will not show an alert because I haven’t applied the Date filters to the Filters in Use Alert worksheet. Changing the Region filter will show an alert because I have applied the Region filter to the Filters in Use Alert worksheet. If you want the alert to show up if any filter is applied, simply apply every filter being used in the workbook to your Filters in Use Alert worksheet.
The last thing to do is add this sheet to your dashboard and soak in your newfound peace of mind!
Thanks for reading,
– Ryan
Related Content
3 Innovative Ways to Use Filters in Tableau
Tableau filters are a dashboard engineer’s best friend. They help us convey a story, enhance the user experience and stay…
3 More Ways to Overcome the Excel Barrier to Tableau Adoption
Yikes – I’m getting old in Tableau years. This week I clicked on a Tableau Public post I thought sounded…
Ryan Sleeper
Keep dashboards clean while maintaining filtering flexibility Ryan shares how to maintain a minimalist design when your stakeholders ask to…
