How to Create a Seamless Navigation Bar for Tableau Dashboards

Have you ever created a multi-dashboard workbook and found your users were confused with navigating through them? Or felt the out-of-the-box user experience didn’t quite live up to your design? If so, you have probably been frustrated with Tableau’s user interface options in the past. Luckily, the Tableau community is a collection of creative geniuses who figure out how to make things happen. Users figured out how to make navigation buttons using dashboard actions, creating brilliant workarounds to provide a feature that Tableau didn’t have. They even took things a step further and created modern navigation bars using external data sources and multiple dashboard actions. These were incredibly creative workarounds, but they had drawbacks; generally complicated to set up, needed outside data sources, and never quite felt smooth or worked 100% as intended.
While we don’t yet have a Navigation Bar object, we do (as of Tableau Desktop 2018.3) have a Dashboard Button object. Buttons allow users to easily navigate to target dashboards/worksheets with a simple click. We can combine multiple buttons together to simulate a modern nav bar. This post will walk through the steps for creating a navigation bar, configuring your buttons, and tweaking the design to provide a seamless look within a Tableau dashboard.
How to Make a Navigation Bar with Buttons in Tableau
Continue reading with a free account, or login.
Unlock this tutorial and hundreds of other free visual analytics resources from our expert team.
Already have an account? Sign In
By continuing, you agree to our Terms of Use and Privacy Policy.
Setting up the containers
By the end of this post, you will be able to create a seamless top navigation in Tableau using the Button and Text dashboard objects.
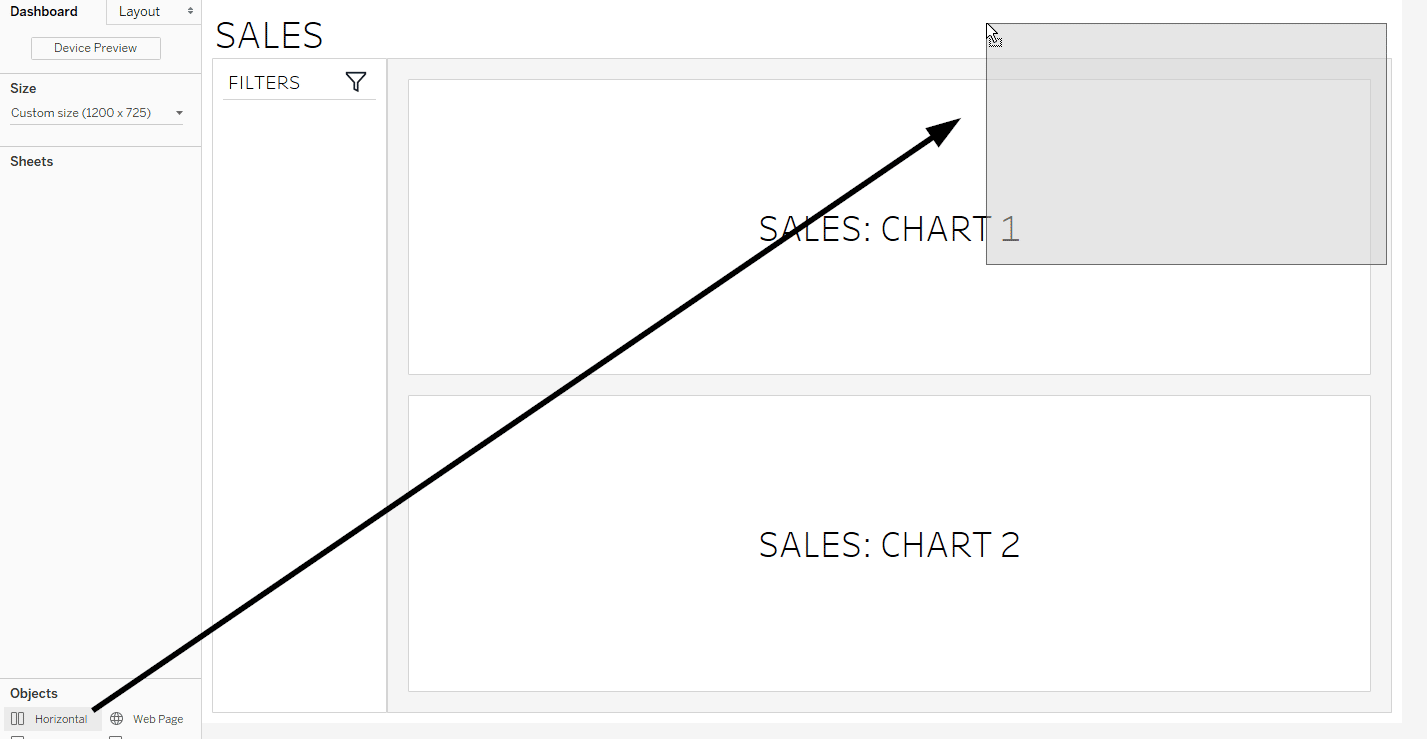
STEP 1. Drag a Horizontal Container onto the dashboard wherever you want your navigation bar to be. In this example, I am placing it in the top-right corner of a dashboard. If you want vertical navigation, follow these steps and replace Horizontal Container with Vertical Container.
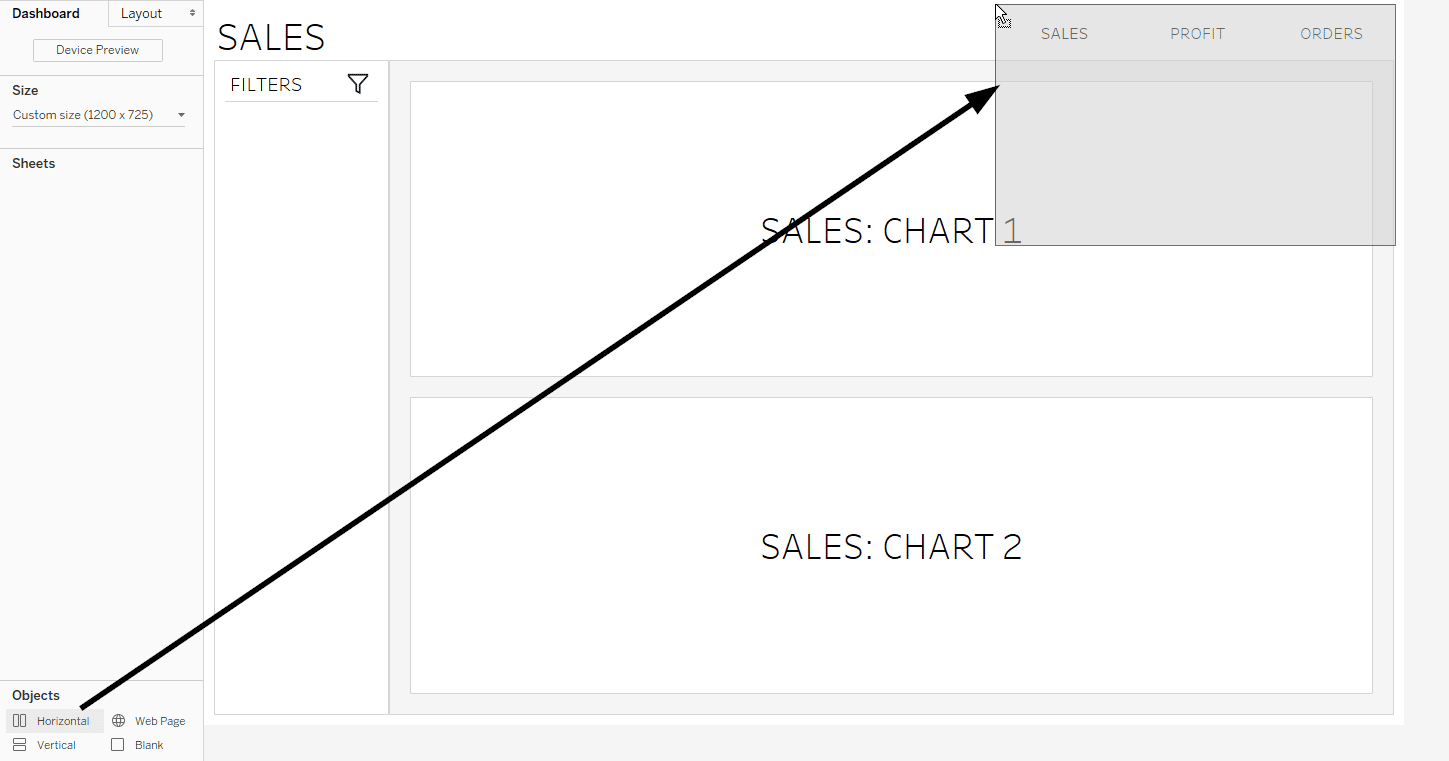
STEP 2. Place Text objects into the container. I like to put the names of each dashboard in the Text objects and center align them, but you can put whatever text makes sense for your design. Tableau should automatically space the text objects evenly, but you can adjust/override this by right-clicking on an individual text object and selecting “Edit Width”. To distribute items evenly within a layout container, select the container, click the down arrow, and choose “Distribute Evenly”. You know it is selected when a blue border appears around the container.

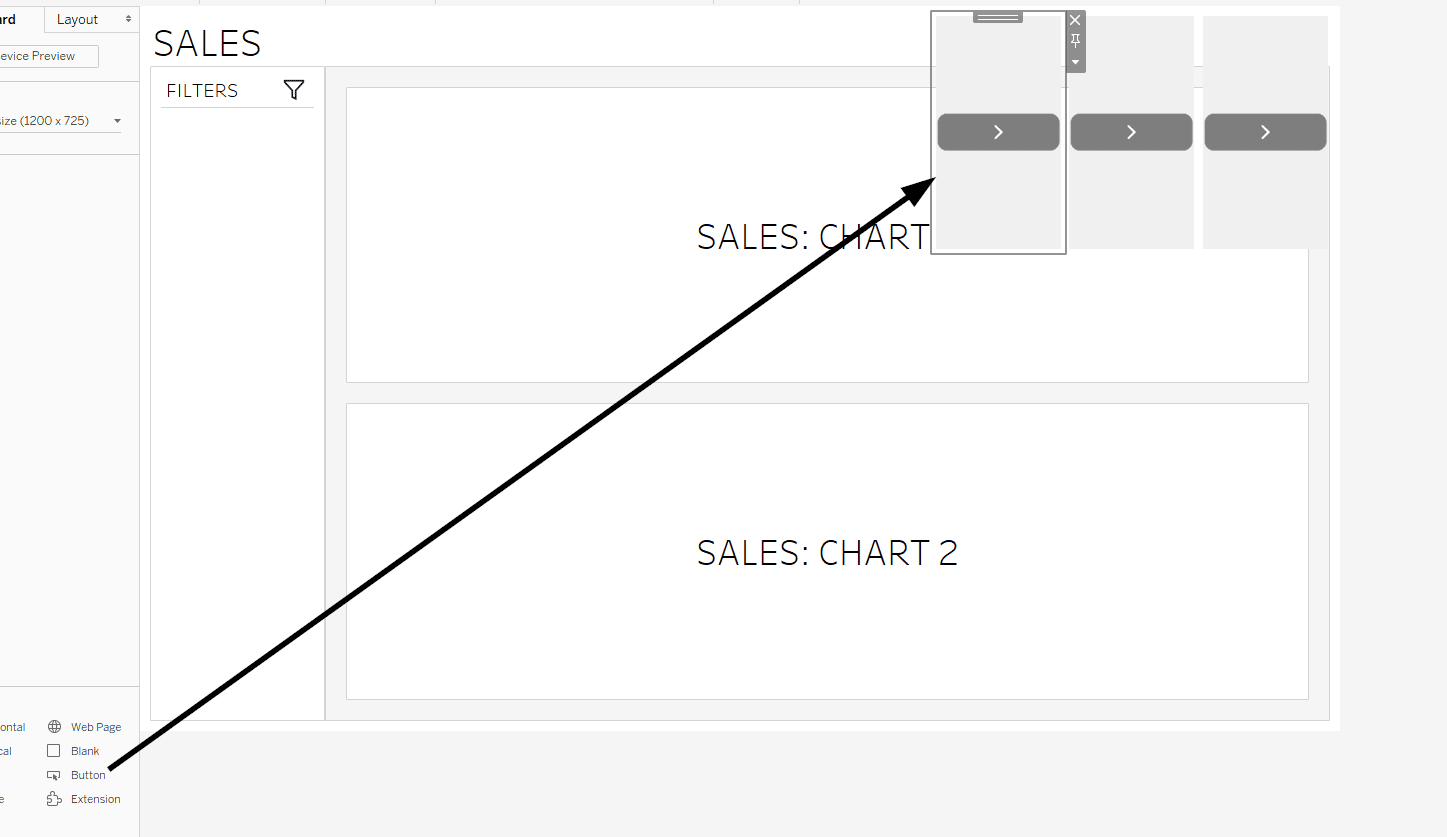
STEP 3. Float another Horizontal Container onto the Dashboard. We are going to put our Button objects in there.
Showing selections with formatting
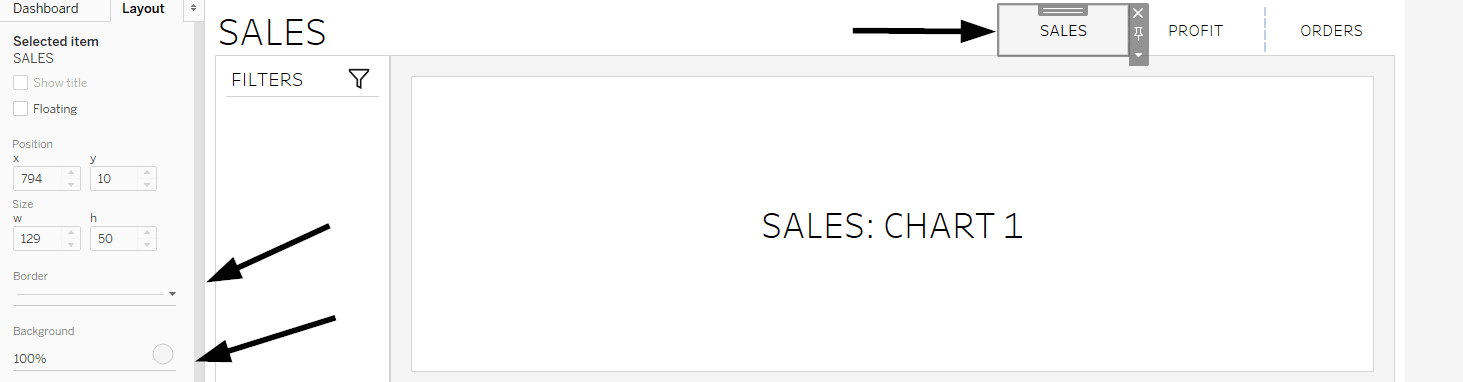
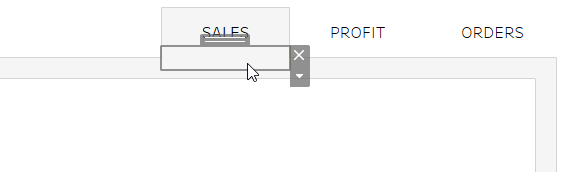
STEP 4 (OPTIONAL). For the Dashboard you are currently on, format the Text object to make it visually stand out. This helps the users know which Tab they are on. This isn’t necessary; just my personal preference.
STEP 5. Place your Button objects into your container. Place the same number of buttons as text objects.
Configure the button objects
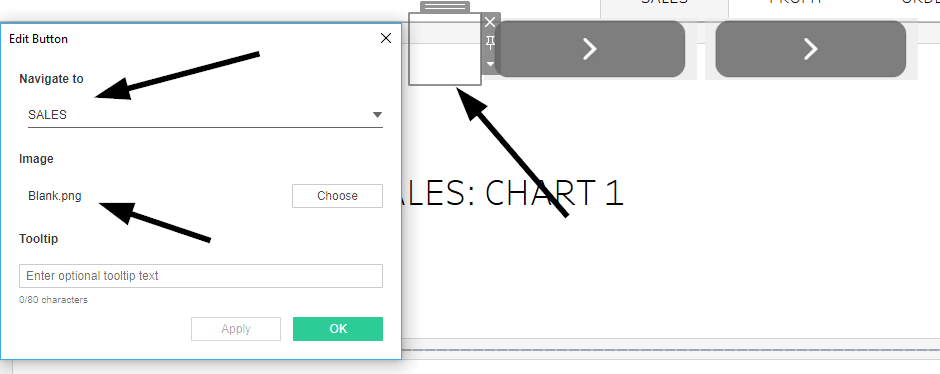
STEP 6. Configure your buttons. Right-click on your Button object and click edit. In the “Navigate to” option, select the dashboard you want to navigate to when the button is pressed. Next, you need to select an image for your button. *The Trick* is to use a transparent PNG image. You can create one in PowerPoint or search for one online. It is just an image of nothing, so your Text labels will be seen behind them.
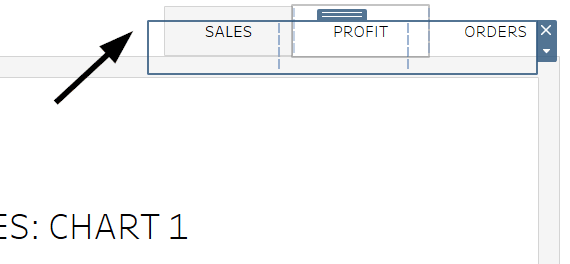
STEP 7. Drag the Horizontal container with the Buttons over the Text object container. Use the Layout pane to ensure they are the same height/width and in the same X / Y positions so they overlap exactly.
STEP 8. Repeat the steps above for each dashboard in your navigation. I like to write down the heights/widths and X / Y positions of the containers and put them in the same place on the other dashboards. This gives it a seamless look when navigating between dashboards.
HOW TO TEST: If you don’t want to publish to Tableau Server / Tableau Online / Tableau Public to test your navigation, on Desktop you can put the dashboard in presentation mode and use the buttons there. You can put a dashboard (or any sheet, for that matter) into presentation mode by clicking the projector icon in Tableau Desktop’s toolbar.
Pixel perfect bonus
PIXEL PERFECT BONUS: If you want to create a seamless border around your tabs, float a Text Object over the bottom border and give it the same background color as the “tabs” you’ve created.
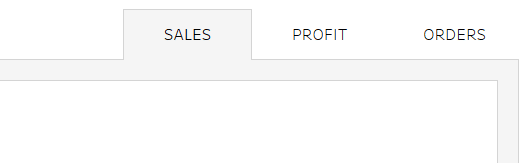
Adding the text object for a seamless appearance
After adding the text object and matching the colors
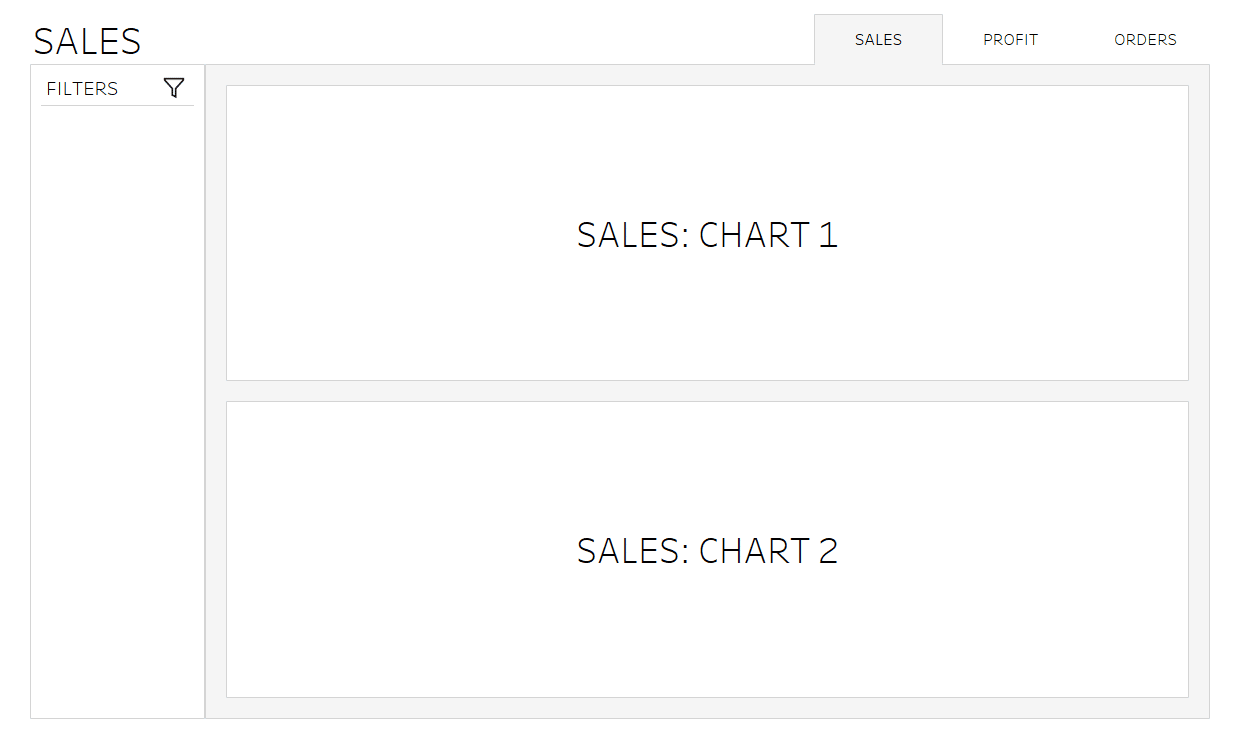
Here is how my final Sales dashboard looks after adding my seamless navigation bar built with Tableau’s Button object.
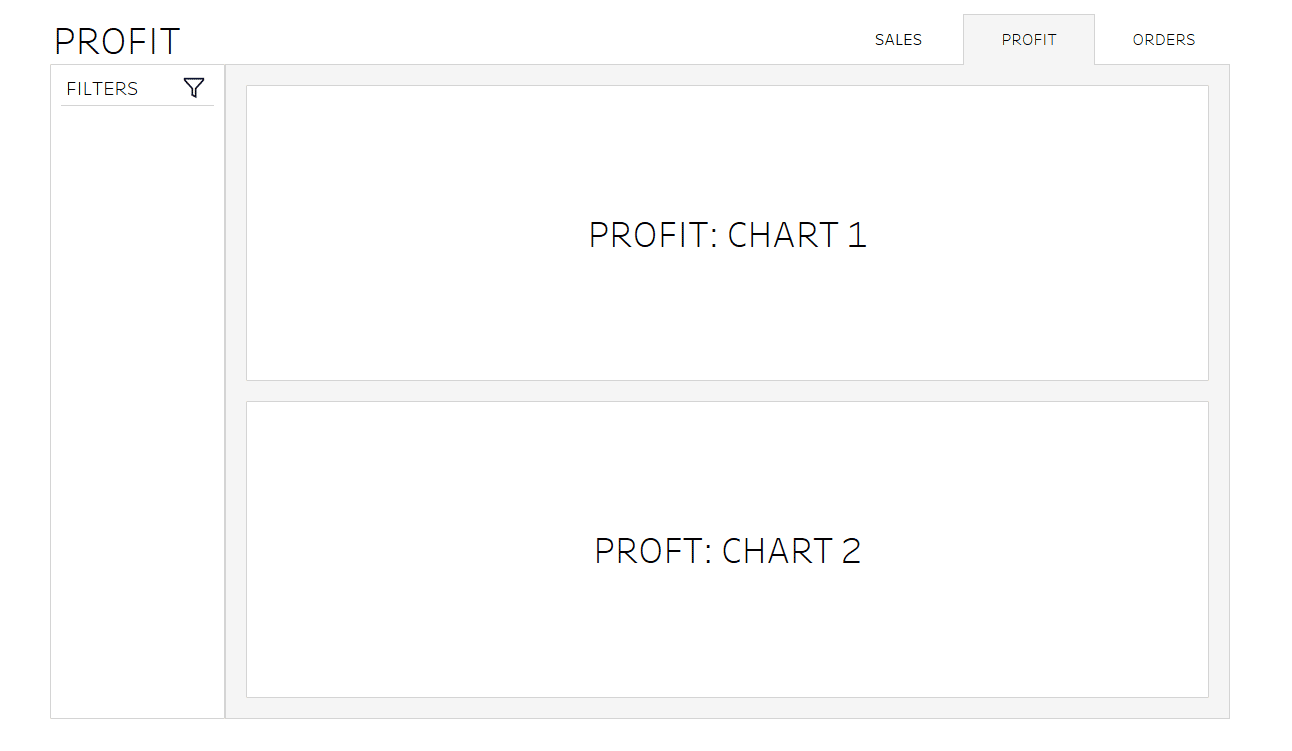
After navigating to a second dashboard, the user gets a smooth web-like experience.
While we don’t yet have a “Navigation” object, this workaround is closer. It’s a few steps and a bit time-consuming, but I’ve found it to be much more intuitive for end users. It gives a modern look, and the dashboards transition much smoother with the buttons than the Dashboard Action method.
Happy Navigating!
– Rody


Written By
Rody Zakovich
Related Content
3 Simple Ways to Improve the UX of Your Dashboards

At Playfair Data, we pride ourselves in improving the UX of dashboards to transform raw data into powerful insights. To…
The Definitive Guide to Buttons in Tableau

The Button. Seemingly simple — yet so powerful. As humans, we are well versed in buttons and have been trained…

Ryan Sleeper
Multiple Options for Navigating Users Between Dashboards and Webpages How to (1) use the Button or Navigation dashboard object introduced…