Bringing Tables Together: Tableau’s Physical Layer
Welcome to our series on bringing tables together! This first article is all about the physical layer in Tableau, including unions, joins, and custom SQL.
Other posts in this series
Part 2 – Relationships and the Logical Layer
Part 3 – Blending Data Sources
Part 4 – Working Across Independent Data Sources
Part 5 – Multi-fact Relationships
The physical layer is hard to find but contains the most intuitive methods for combining data. Unions and joins are universal, unlike blends and relationships, which are Tableau-specific.
How to access Tableau’s physical layer
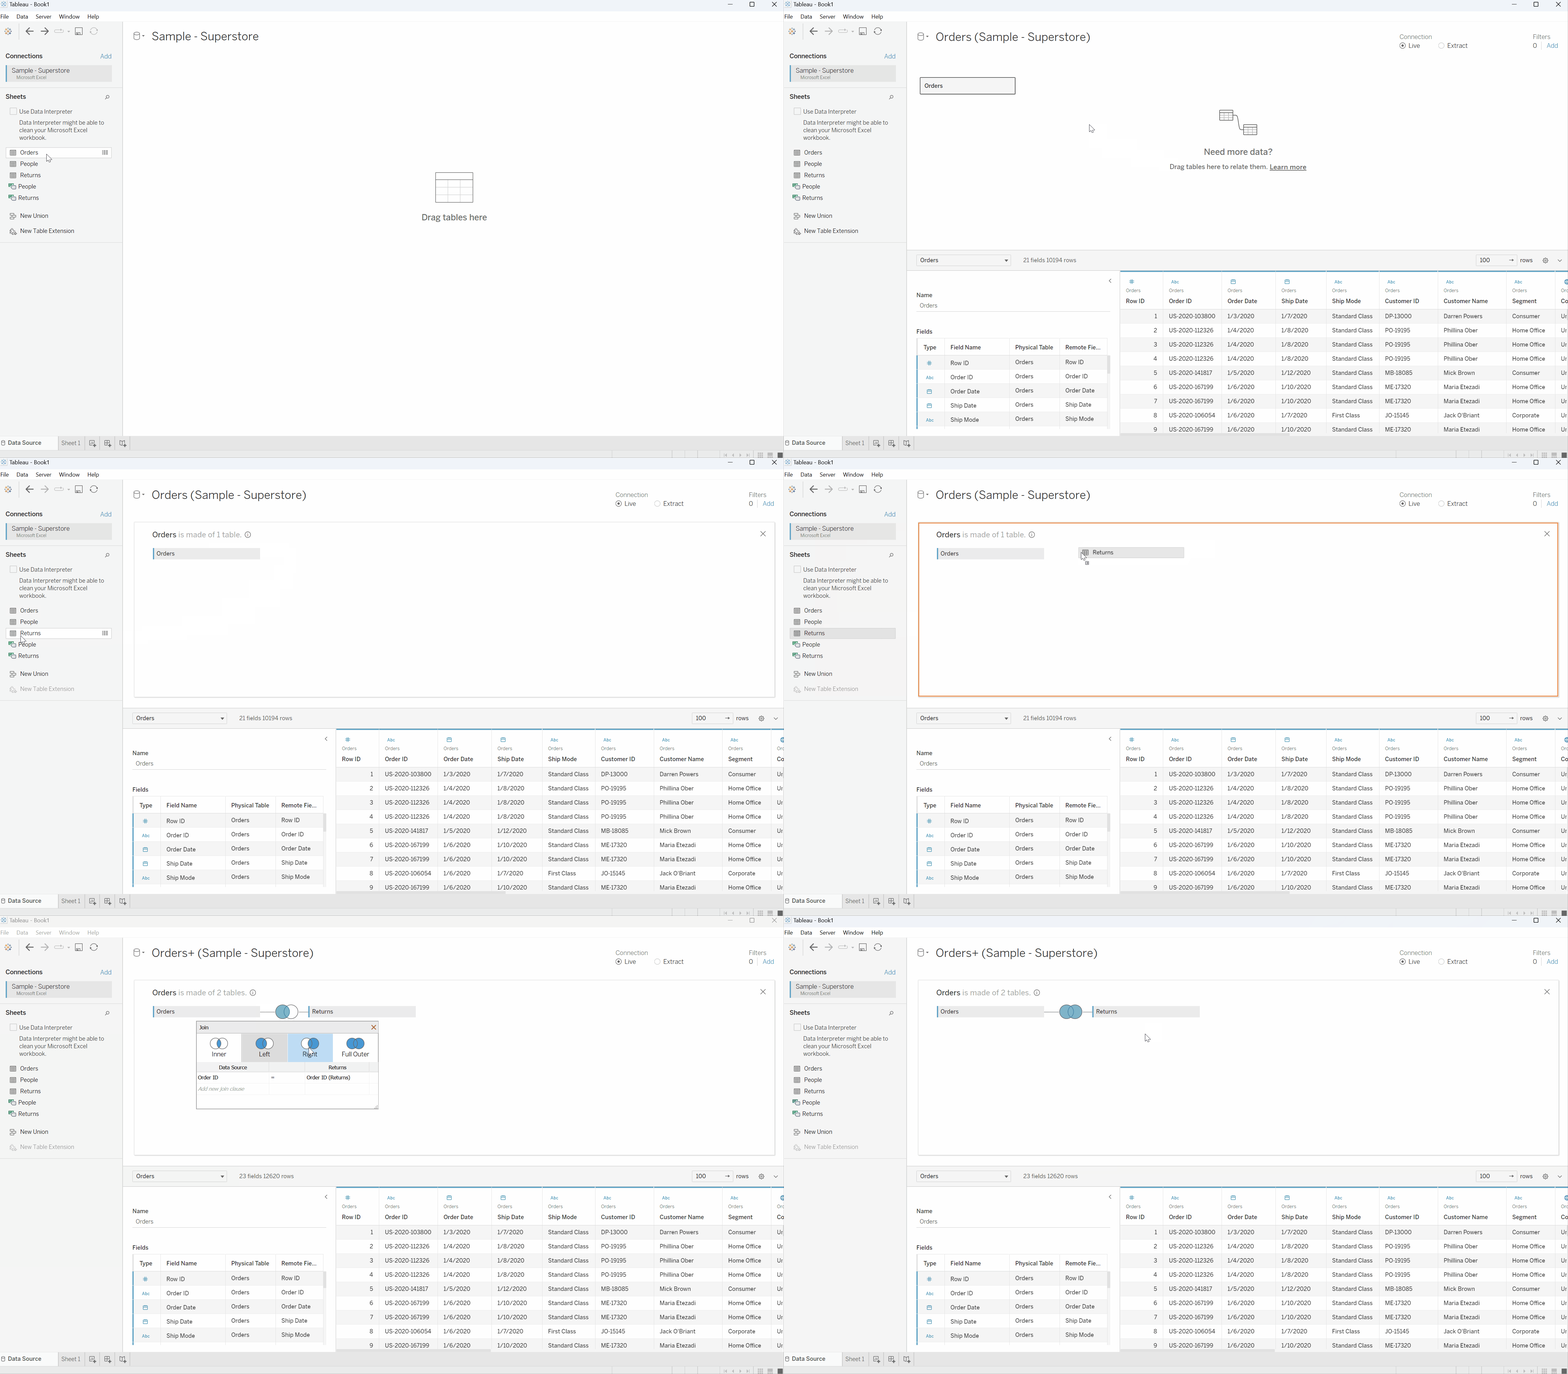
To access the physical layer, simply double-click on any logical table in the logical layer.
Lost? No worries! First, navigate to the data source page by either connecting to a new data set or clicking the “Data Source” tab at the bottom of Tableau’s Authoring interface. For file and database connections, you’ll see something similar to this window.
Create a free account, or login.
Unlock this tutorial and hundreds of other free visual analytics resources from our expert team.
Already have an account? Sign In
How to Create Joins and Unions with Tableau’s Physical Layer
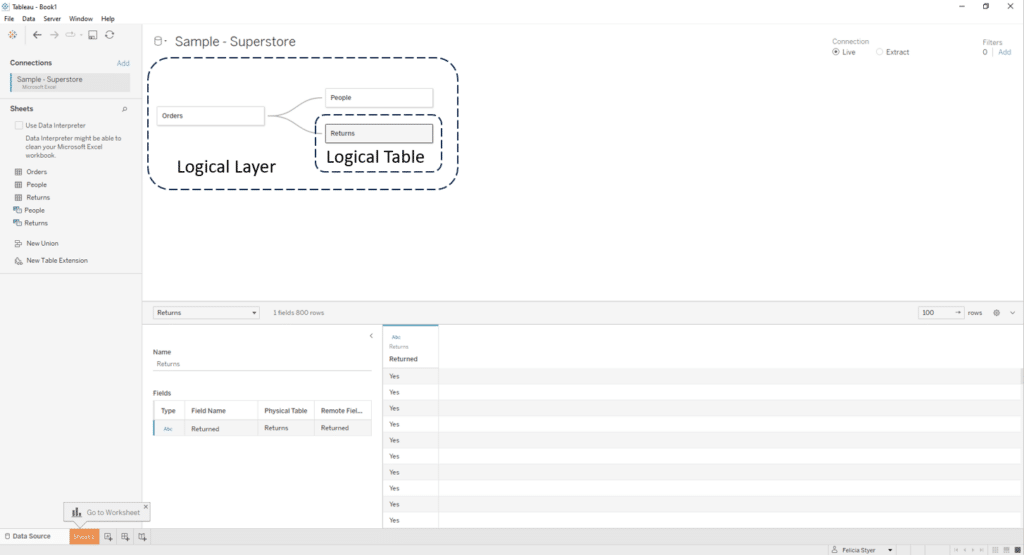
Related Knowledge Base article: Data Source Page
The area below the data source name is the canvas. By default, the canvas shows the Logical Layer, an area where the user can drag and drop tables or sheets and create relationships. Rectangles on the Logical Layer are called logical tables, and each one represents a different physical layer. To access the physical layer, double-click on a logical table.
💡Tip – Direct connections, including Tableau Cloud, Google Analytics, and others, might not include logical and physical layers. For these connection types, you may need to work across data sources, which will be covered in the third part of this series.
Creating joins on the physical layer
To create a join, start by bringing your primary table into the logical layer. Open its physical layer and drag a second table into the layer.
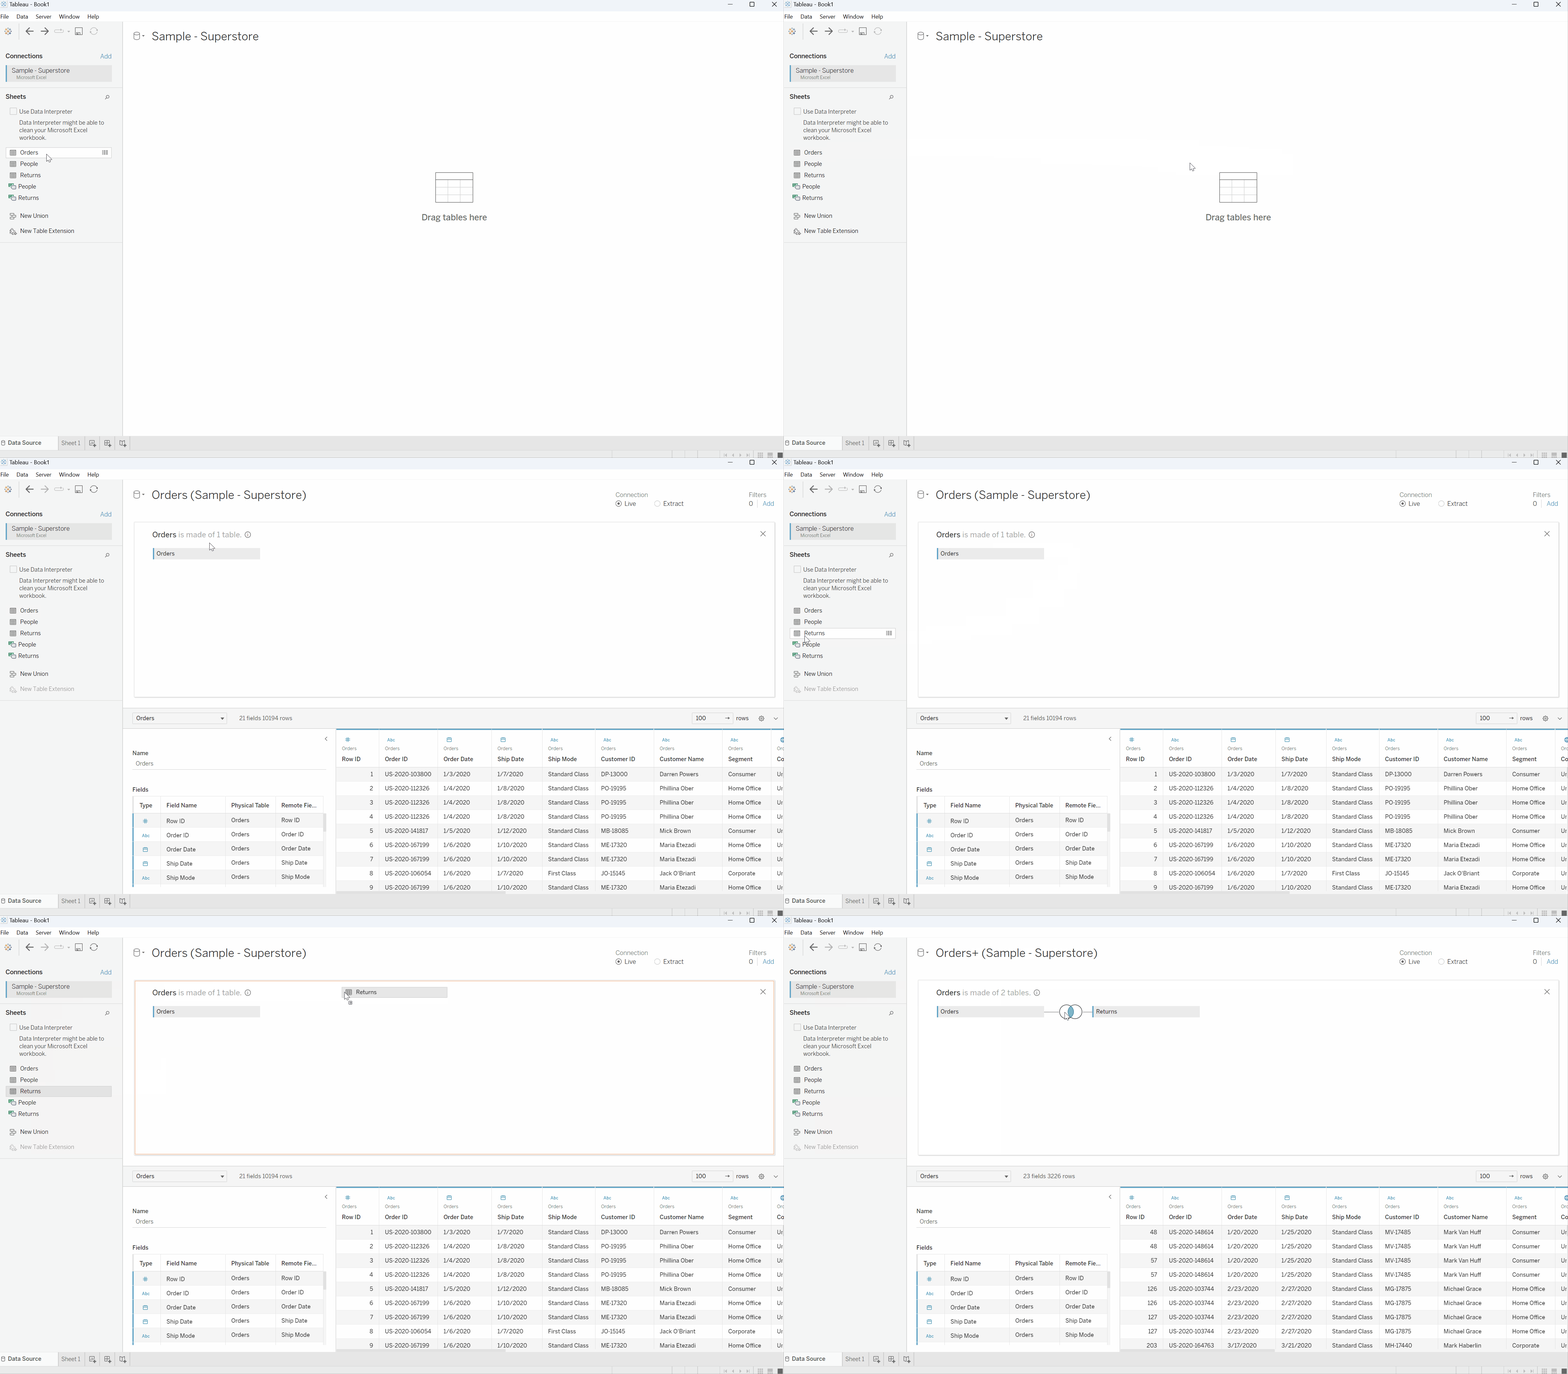
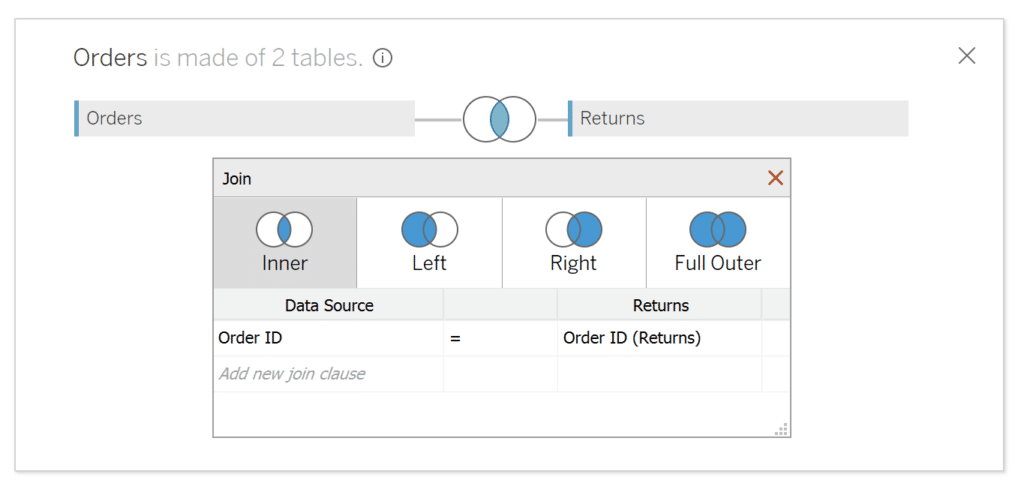
Click on the join icon to change the join type and set the join condition. Multiple keys can be used in the join condition, including join calculations.
If your joining key isn’t an exact match across tables, join calculations allow you to modify and combine fields to create a joining key. For example, if you have a key stored as ‘00123’ in one table and 123 in the second, you could use INT([Key]) as a join calculation on the first table to convert ‘00123’ into 123.
Not sure which join type to use? Here’s a quick rundown. Tableau defaults to an Inner join, with just the Venn diagram intersection highlighted. The resulting table will keep the keys shared between tables, and exclude all unmatched keys. Full Outer Joins, with the entire Venn diagram highlighted, are the opposite. The resulting table will include all records from both source tables. When keys aren’t matched, the resulting row will include nulls for the keys and fields brought in from the other table. Left and Right joins include the mismatched keys from just one table.
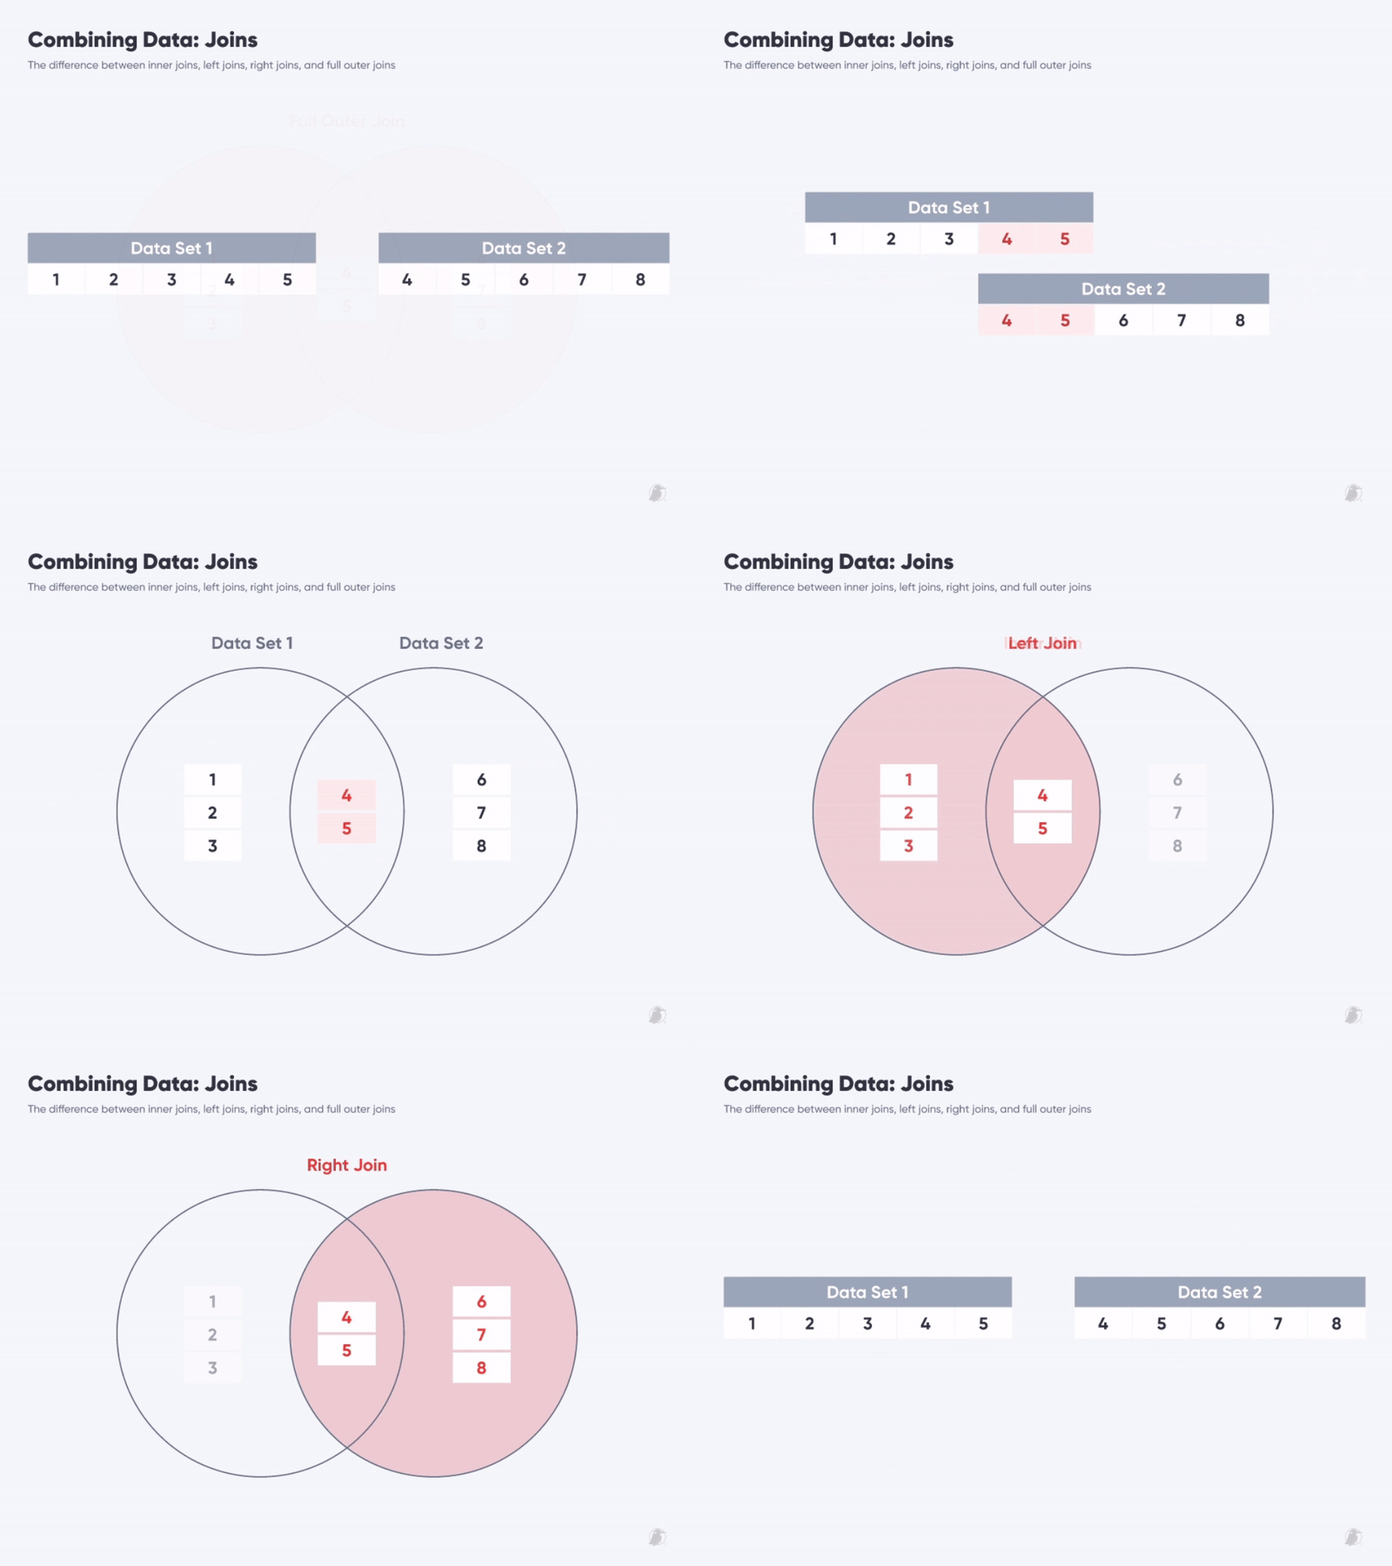
Related Knowledge Base article: Join Your Data
Creating unions on the physical layer
To create a union, bring one table into the Logical Layer. Drag a second table and drop it directly below the first one. This can be done from the Logical or Physical Layer.
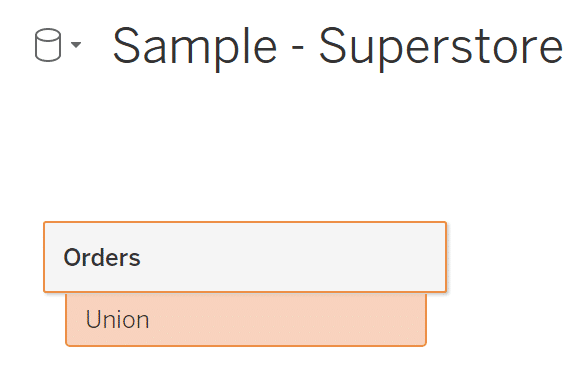
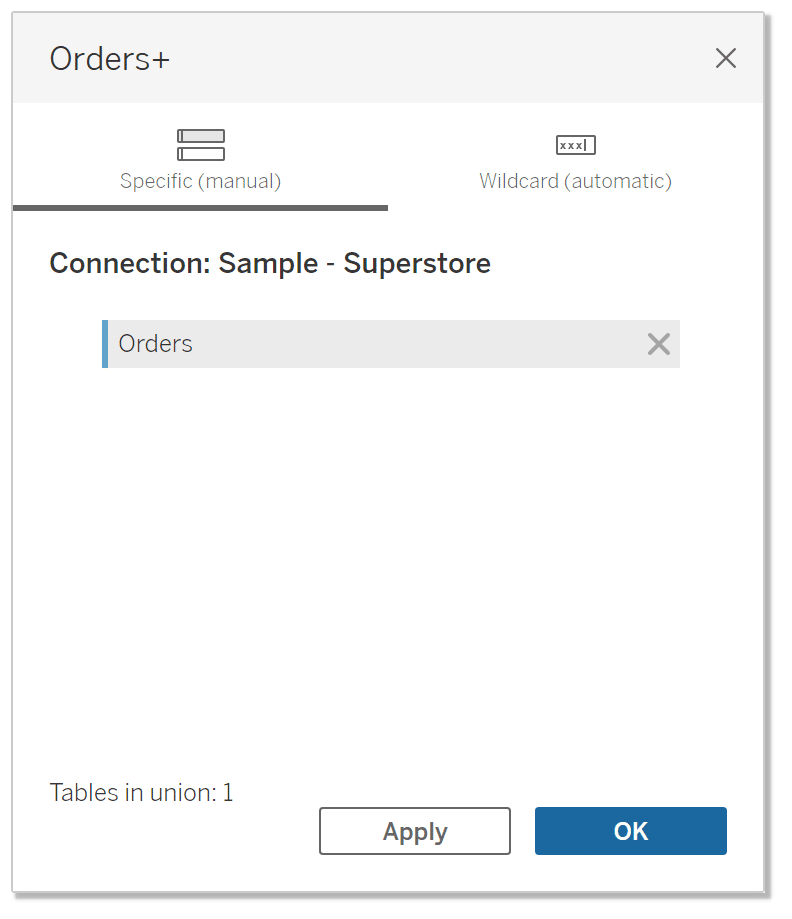
If this is giving you trouble, you can go to any table in the physical layer, open its menu, and select ‘Convert to Union’. This opens the Edit Union window. On the Specific (manual) tab of this window, you can drag & drop tables onto the list or remove tables from the union list.
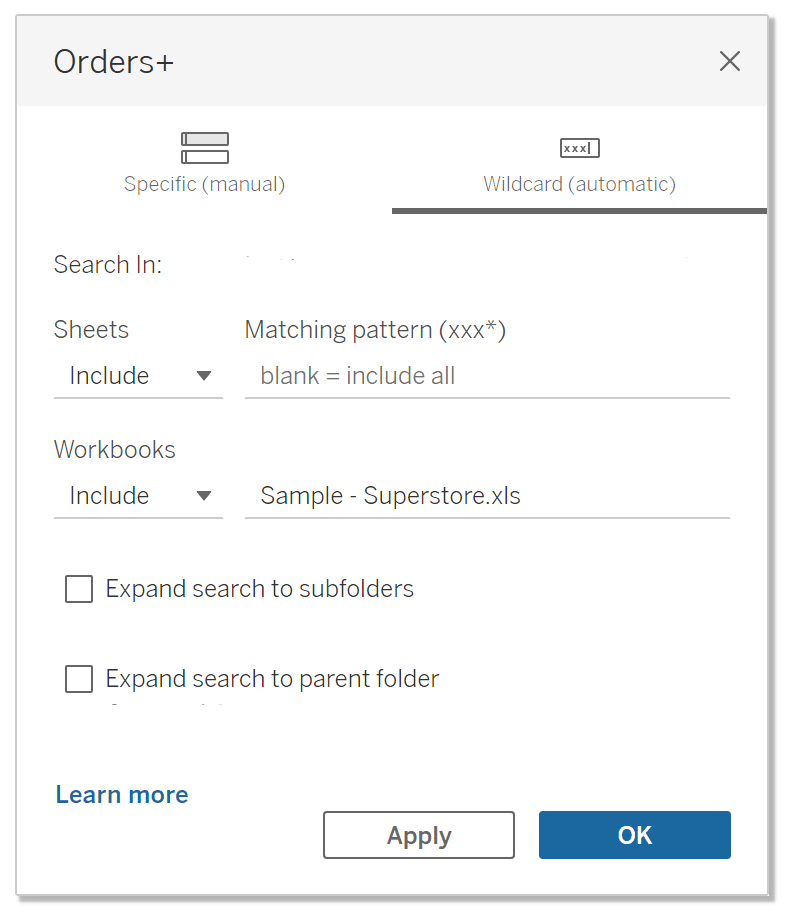
The Wildcard (automatic) tab uses file name patterns to automate union creation. This is a great tool for bringing together periodic files, where future files that will need to be appended may not exist yet.
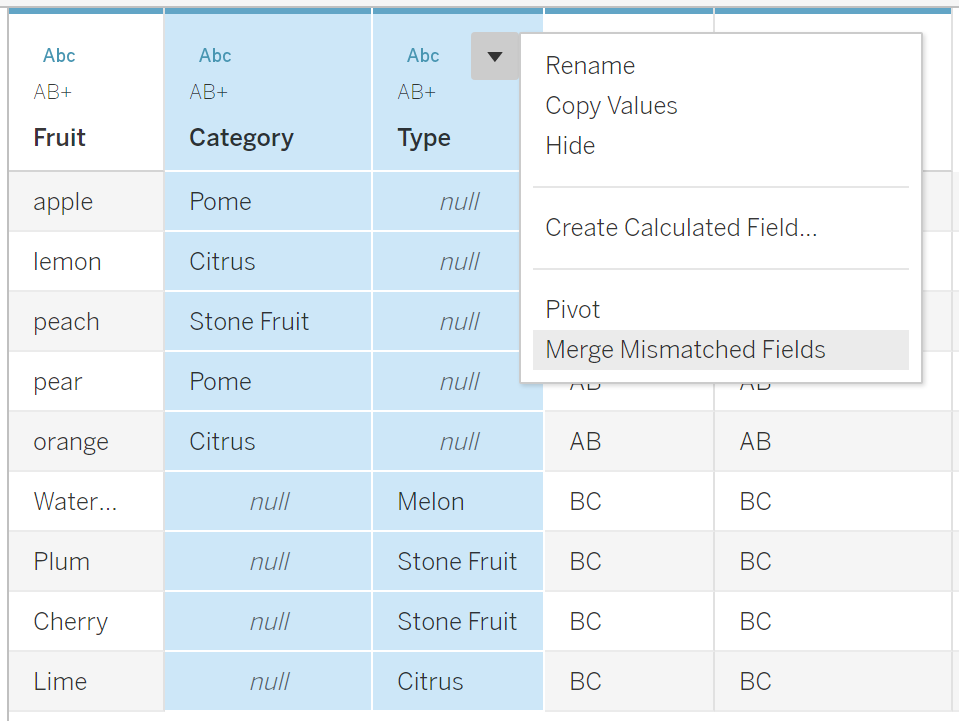
Any columns not present in all tables will appear in the unioned data with nulls for the tables where the field is absent. Fields with different names across tables can be combined by selecting both fields in the Data Grid, opening the dropdown menu, and selecting Merge Mismatched Fields.
Related Knowledge Base article: Union Your Data
Pulling custom SQL queries in Tableau
Database connections also have the option to bring Custom SQL into the Logical Layer. Just like unions and joins, the resulting tables are Logical Tables, and can be connected to other Logical Tables with relationships on the Logical Layer.
Custom SQL is a makeshift way to perform more complex data transformations within Tableau Desktop. For optimal performance, this SQL should instead be implemented upstream as a view or table in the database. However, if you lack write access, want to avoid creating a view for an ad-hoc request, or need to store the SQL and workbook in a single file, then Custom SQL is a good fit.
To use Custom SQL, open the Data Source page with a connection to your database. Look for the Custom SQL option on the left side below the table names. Drag this onto the canvas as if it were a table. This will open a window where you can enter your SQL statement.
When using custom SQL, be sure to use an extract. Live connections with Custom SQL generally have performance issues. To do this, make sure Extract is selected instead of Live in the upper right corner or the data source page.
Related Knowledge Base article: Connect to a Custom SQL Query
Using joined or unioned data
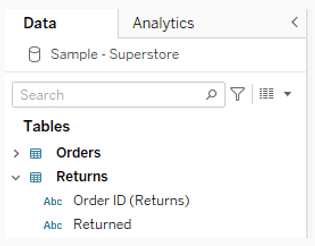
Joined data sources will group fields by the source table. This looks like a dropdown with the table name as the header and the fields grouped below it.
Unioned data sources include an auto-generated field called Table Name that identifies each row’s origin table.
Use cases for joining and unioining data
Let’s get the easy one out of the way! With unions, use cases are pretty obvious. When you want to add rows from one table to another, and they share the same columns (or most columns) you’ll need a union.
Joins work best when tables have unique joining keys. In other words, no two rows in the same table share the same joining key. When more than one row matches a key, each combination of values will exist in the final table. Joins with shared keys can create tables with more rows than the two input tables combined! Shared keys often create duplicate measure values, which have to be deduped with filters or LOD calculations.
Solutions from Tableau Training: How to Deduplicate Joined Rows
Here’s a quick demonstration of how join behavior can vary as key uniqueness changes.
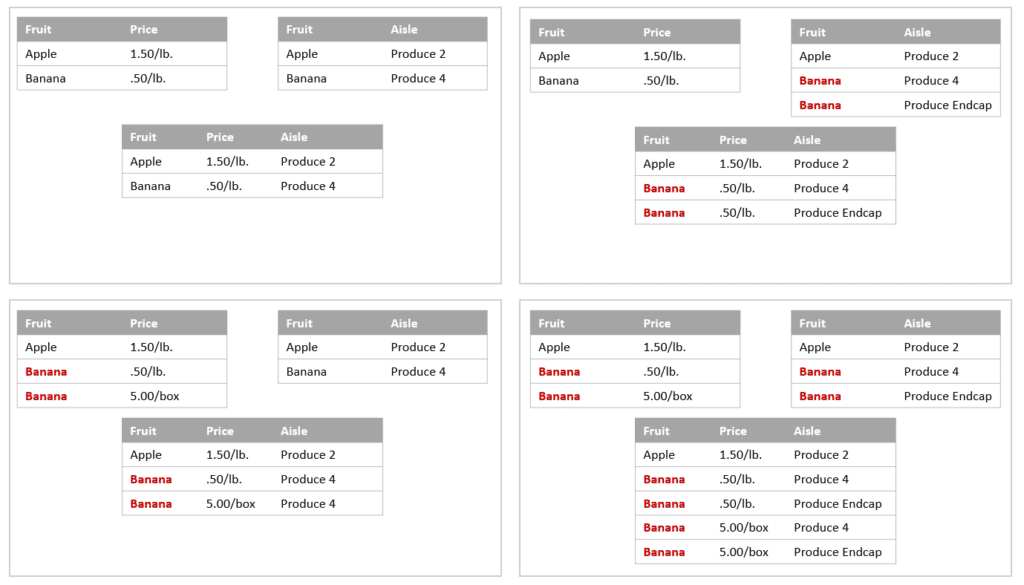
If you are working with non-unique keys and want to prevent measure duplication, try using a relationship on the Logical Layer instead.
For more information on relationships, check out part 2 of this series!
Thanks for reading!
Felicia
Related Content
Bringing Tables Together: Tableau Relationships
This is part two in a series on combining data tables together for analysis in Tableau. Other posts in this…
Ryan Sleeper
Where to start with Tableau’s 50+ data connections You’ve downloaded the best Tableau product for you, but what now? This…
Solutions from Tableau Training: How to Deduplicate Joined Rows
There are always problem-solving brainstorms at our Tableau training events, and sometimes the solutions are so relevant for all Tableau…

