How to Implement Row-Level Security in Tableau

When working with data, security is always top of mind within an organization. Most businesses spend a lot of time and effort protecting themselves from outside threats. However, how do we protect our data from internal threats? With the distribution of data throughout departments becoming all too common in the industry, how do we control the flow of data to get it to the users who need it but also control their access to data they don’t need? One possible solution to this dilemma is to implement what is called row level security in Tableau.
An approach to implementing row level security is to create separate reports or data sources that filter out certain data then grant access to the groups who need them. With this approach, we are creating a lot of technical debt because now our developers and data engineers have to manage and update multiple reports/data sources. Even creating groups and setting permissions within Tableau Server as an admin does not solve this issue directly. With permissions in Tableau Server, you can only define if a user can access that report or not; but you cannot define what data they can access within the report.
As a Tableau Server admin or site admin, we can solve this problem by implementing row-level security on our reports. By implementing these filters, we can control what users see based on their username or a group they are assigned to within the server. This alleviates the need to build multiple reports or data sources. In this tutorial, I will show you how to implement row-level security in Tableau on individual users and a group of users. As a bonus, I will also walk you through how to set it up so that it is dynamic when new data is loaded.
Row-level security for individual users
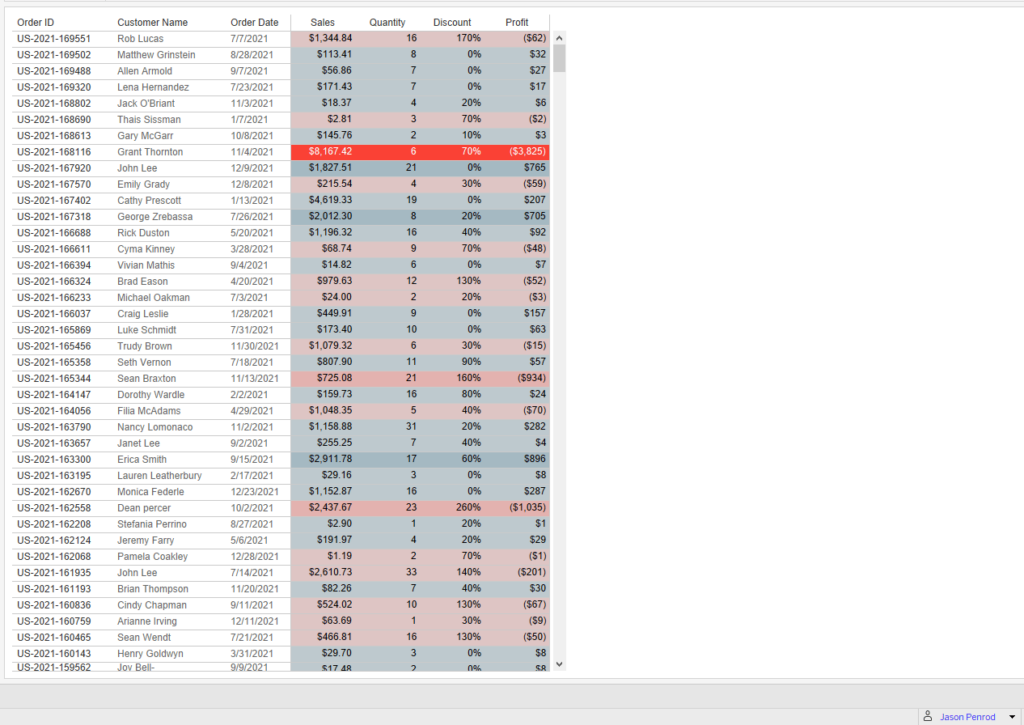
To begin I pulled a workbook from an old blog of mine titled How to Sort by Multiple Data Types which you can download by clicking the link. This workbook is connected to the Sample-Superstore dataset and is setup perfectly to demonstrate row-level security. Here is the current table:
Tableau Hack: How to Sort by Multiple Data Types

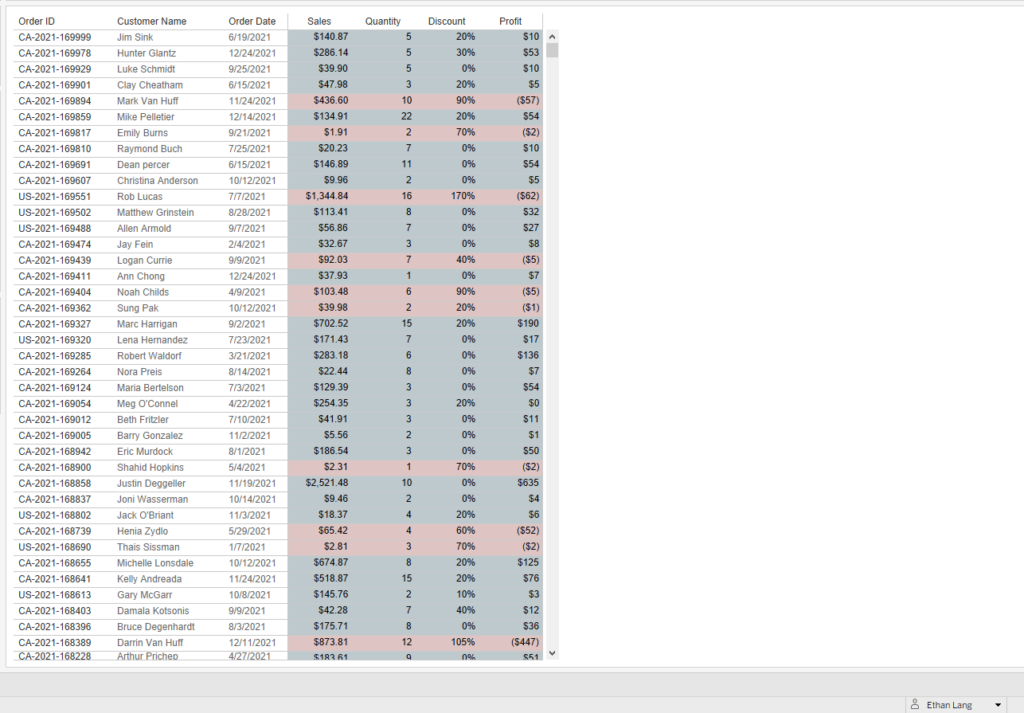
In this workbook, we have Order ID, Customer Name, and Order Date by some sales measures. If we look at Order ID we can see some start with CA and some start with US. Let’s pretend in my organization that we have two sales teams, one being the Canada sales team and the other being the US sales team. In my organization, I want to create a dashboard where those sales teams can go in and look up information on orders. However; I want to limit the Canada sales team users to see only their orders and the same for the US sales team.
![]()
To do this we can implement row-level security in Tableau Server that will look at the username viewing the dashboard and limit the rows they can view.
First, sign in to Tableau Server or Tableau Online. From Tableau Desktop click on Server in the top Navigation and select Sign In. Choose the server you are logging into and then the site you want to publish to.
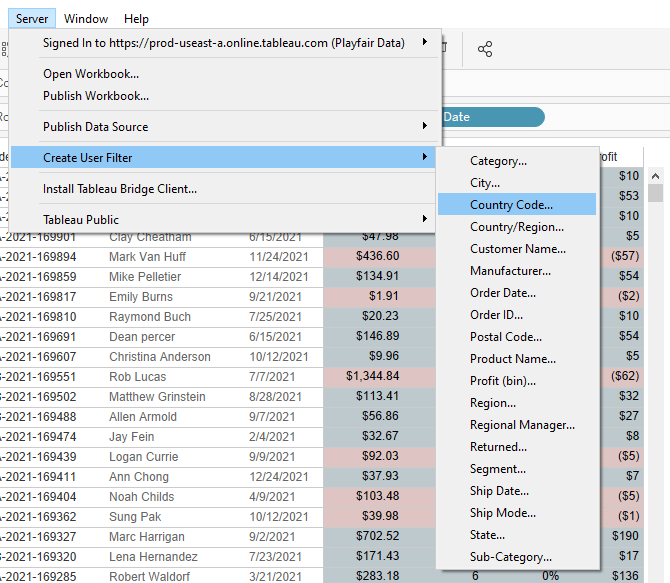
Now that we are signed in, I will click into any sheet on the dashboard then click Server from the top navigation, hover over Create User Filter, and click Order ID.
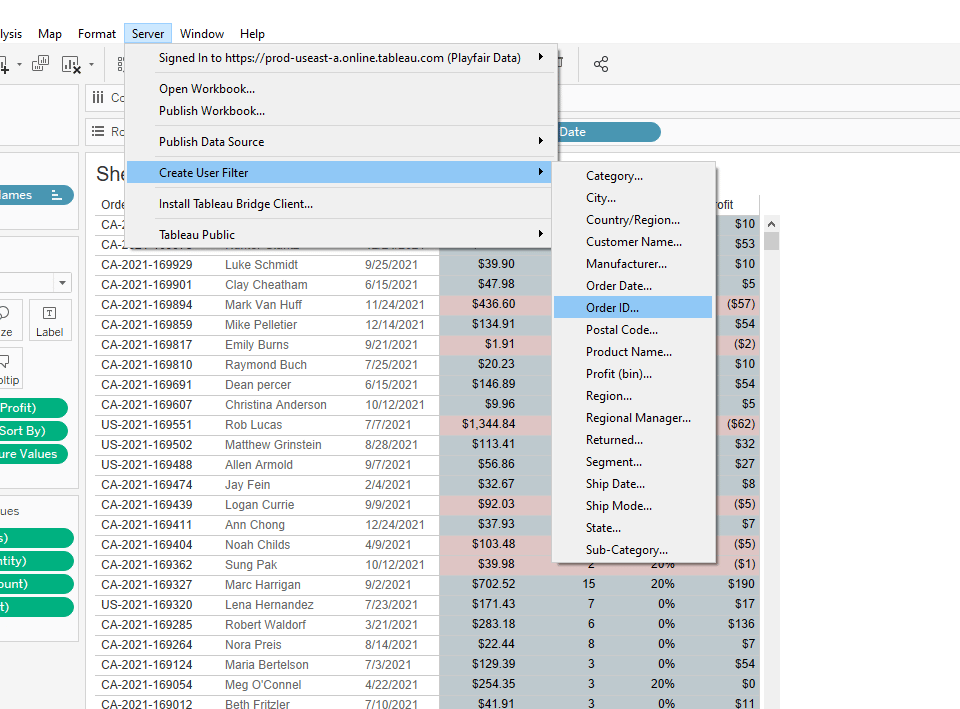
Note: All the dimensions in your data are displayed here. Feel free to choose any dimension you want to filter your data on.
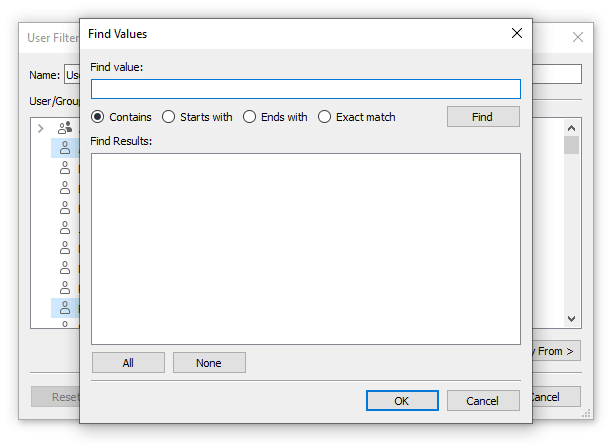
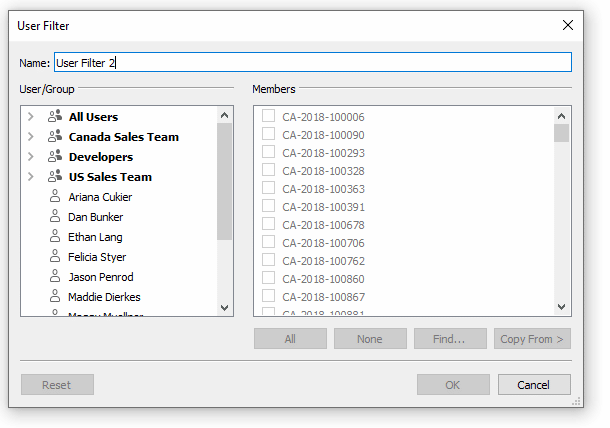
We will see a dialog box appear.
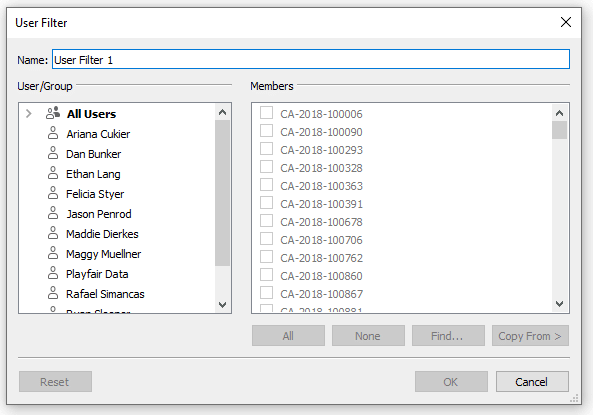
On the left side of this dialog box, we have a list of the users that are on this server. On the right side, we will see the dimension members displayed.
Going back to my use case I want my Canada Sales team to see only Orders that start with CA and my US sales team to see only Orders that start with US. To define these users let’s say Rafael and Ariana are a part of my Canada sales team. Jason and Felicia are a part of my US sales team. Everyone else is a developer and won’t have restrictions on their access.
Let’s set up the Canada sales team first. To do so I am going to hold control and click on those two users on the left side of the pane.
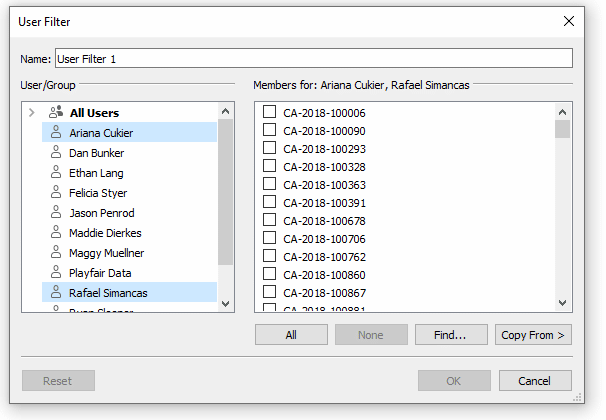
When I do so they will be highlighted in blue on the left and, on the right, we will see the top header will update with their names. Now that I have my users selected, I need to define what dimension members they should have access to in the data. I will click the Find button on the bottom right. This will open a new pane where we can apply some logic to the data to find specific values.
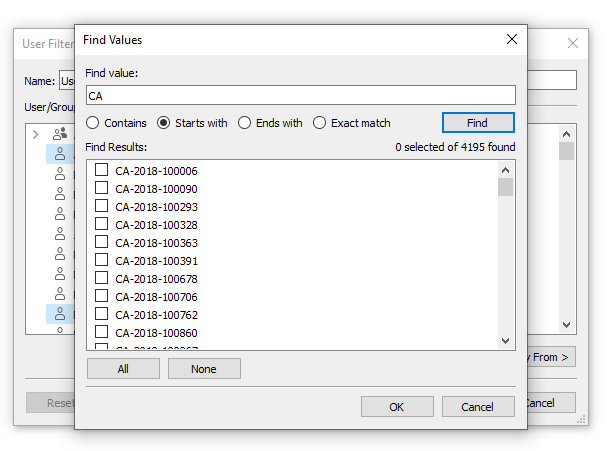
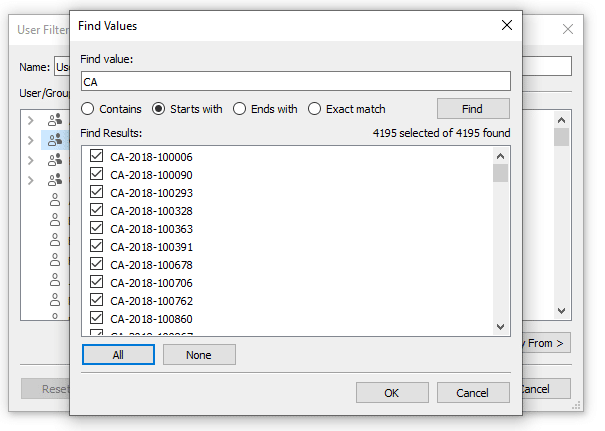
Like I mentioned before, our Canadian orders will start with CA in the Order ID. I will select the Starts With radio button from the options at the top, enter CA into the find value input and click Find.
Continue reading with a free account, or login.
Unlock this tutorial and hundreds of other free visual analytics resources from our expert team.
Already have an account? Sign In
By continuing, you agree to our Terms of Use and Privacy Policy.
We can see that the values found show up in the Results section. We can also see in the top right below the Find button that we currently have 0 selected of 4,195 records. To be sure my logic worked I will quickly scroll through the results and spot-check they all have CA on the front. Another tip here is to create a QA sheet in Tableau Desktop and filter to those values, then you can compare the total number of records for accuracy.
Once I double-check everything for accuracy, I am going to click the All button and then click OK. The Find Values pane will close and we see on the left that Ariana and Rafael now have a checkmark to the right of their names.
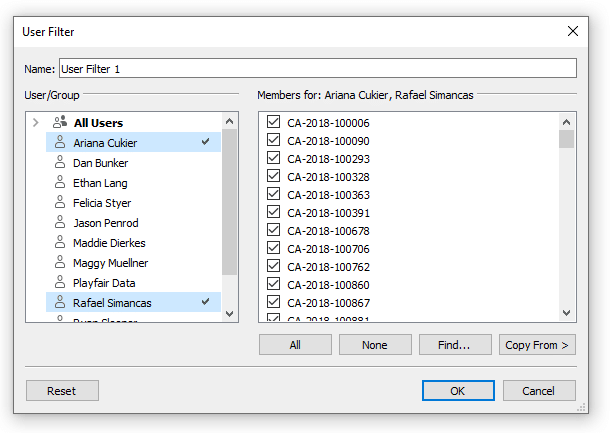
This lets you know that a filter has been applied to those users.
Now I want to set up my US sales team. I will complete the same steps by selecting my users, clicking Find, entering my criteria, and clicking OK.
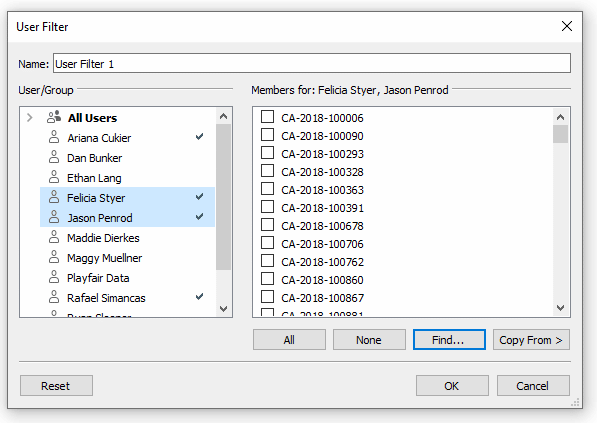
We now see Felicia and Jason have checkmarks next to their names as well.
The last step is to define access for the rest of the users. Like I mentioned in the beginning everyone else should be considered a developer and therefore have access to all the data. If I were to click OK now without defining what they should have access to then they will have access to nothing and if they were to view this dashboard on Tableau Server it would be blank with no data. To demonstrate this, I will select all the users except Dan Bunker then click the All button.
Now that I have defined the data my users can view, I will name my User Filter “Sales Team User Filter” and click OK.
We will see a new dimension appear in the Data pane with a unique symbol next to its name. This is our new Sales Team User Filter.
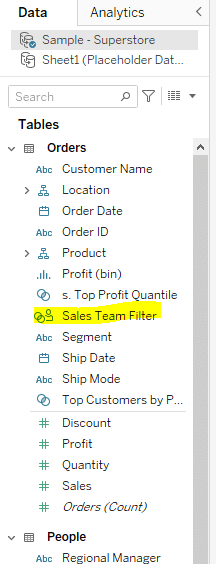
If you right-click on this new field, you will see that it is treated like a Set. In Tableau, we have just created a Set that your users are in or out of.
Let’s add our new User Filter to the Filters shelf. Once we drag it there, I want to point out that Tableau adds this filter to context by default. This is denoted by the color of the pill on the Filters shelf. We can see that the Sales Team User Filter is grey. If we recall the Tableau order of operations, we know that context filters happen right after data source filters and therefore this User Filter is being applied close to the top of the order of operations.
Quality assurance
I have added the filter and nothing appears to have happened, how do I know it’s working once I publish? As a Server Administrator, I can mimic my user’s access directly from Tableau Desktop to ensure the filter is working as it should.
In the bottom right-hand corner of the authoring interface in Tableau Desktop, I can see my name and a down arrow next to it.
If I click on my name, I will see a list of users pop up that I can select from.
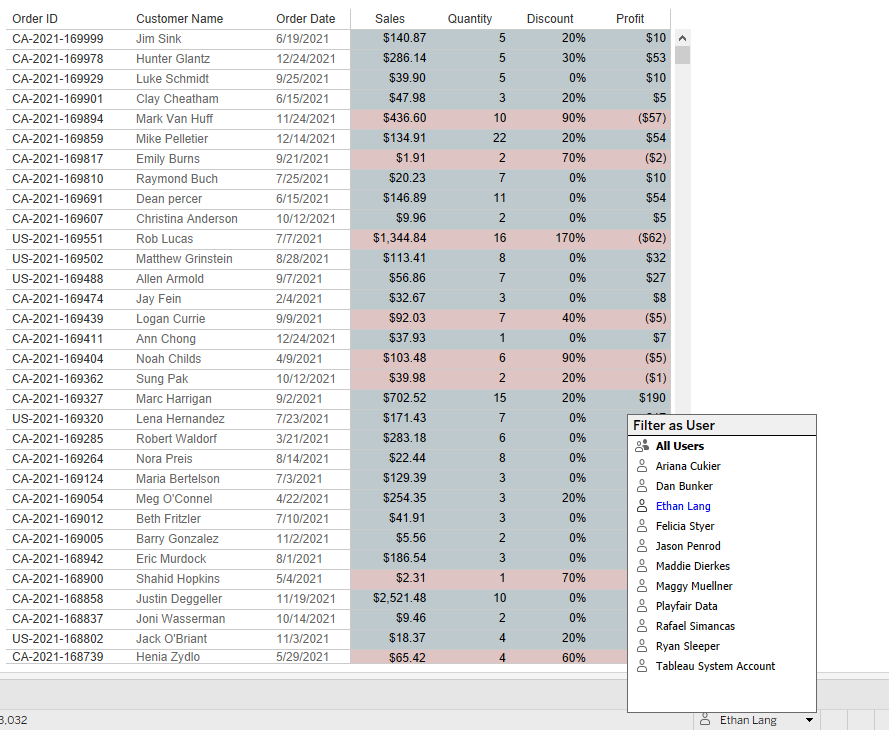
From this list, I will select Ariana Cukier who is a member of our Canada sales team. When I do, I will now see her name in the bottom right and it will be highlighted in blue which lets me know that I am now incognito and seeing what she would see.
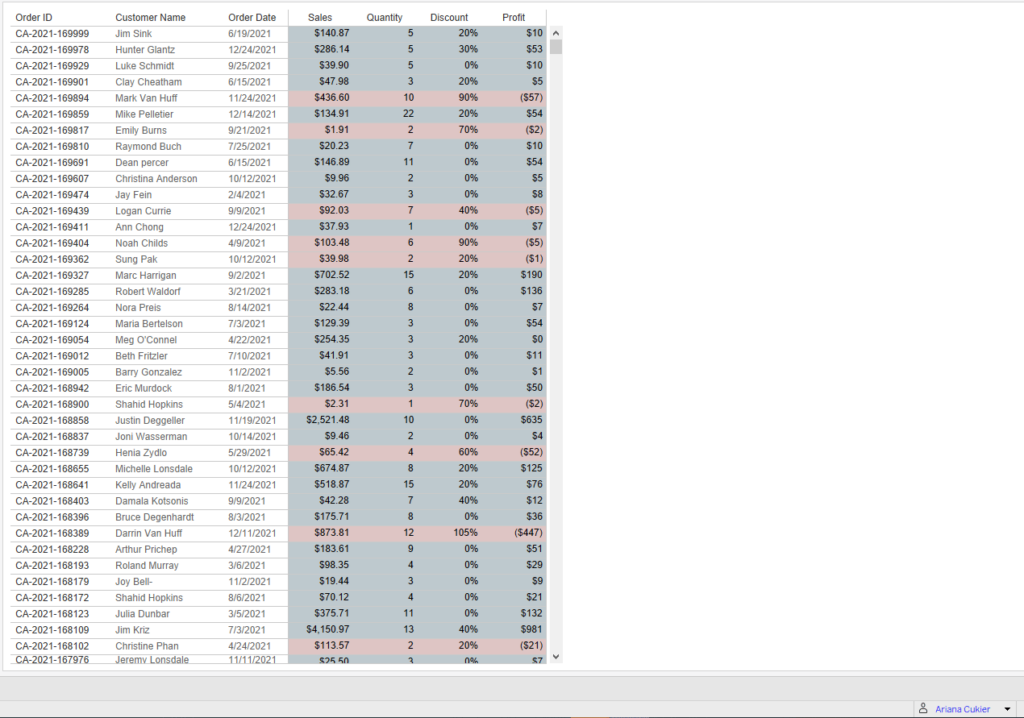
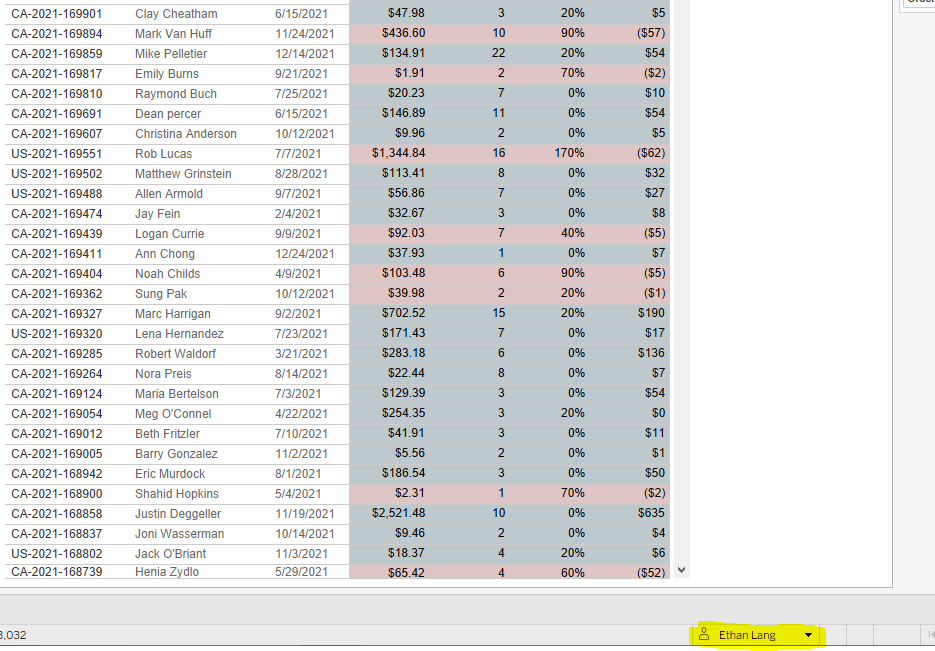
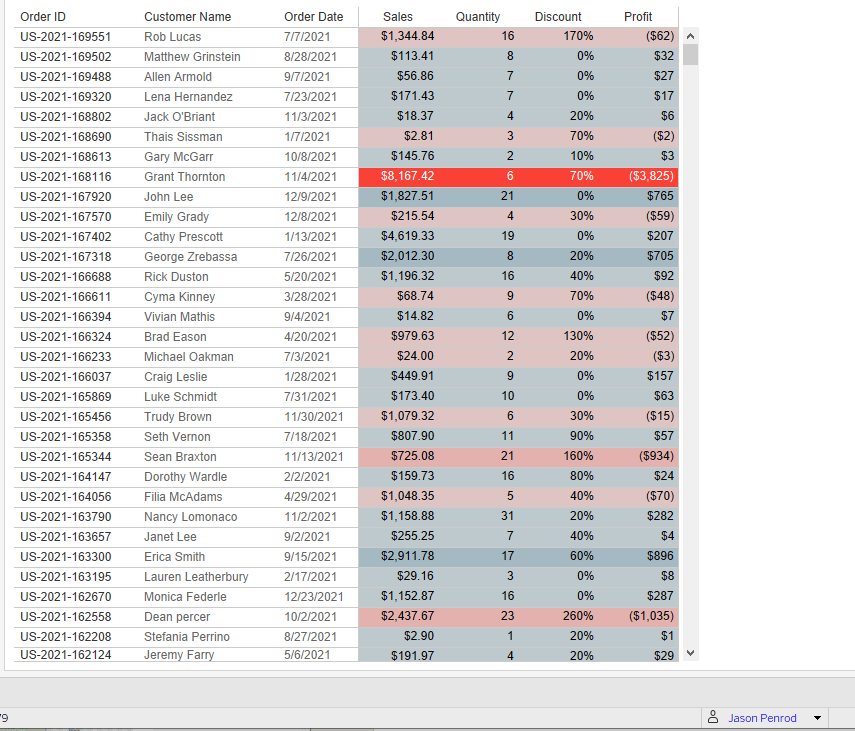
The change was very subtle but if we compare the screenshot before and after I switched, we can see that all the US orders have disappeared from the view. For an even more dramatic change let me switch to Jason who was a member of our US sales team.
We now see his name displayed at the bottom and only US orders. We can see that our filter is working like it’s supposed to, however, recall that I did not define Dan Bunker’s access in the previous section. If I select Dan we can see that all the data disappears and we are left with a blank sheet.
This is good to keep in mind that if you do not define a member, they will not be able to see anything. With this final check, we can conclude that our User Filter is working and we are ready to publish.
Row-level security for groups
The last tactic worked great however what if we have hundreds of users to manage or thousands?! That could become cumbersome trying to do each member individually and is extremely error-prone. To make things easier we can fall back on groups within Tableau Server.
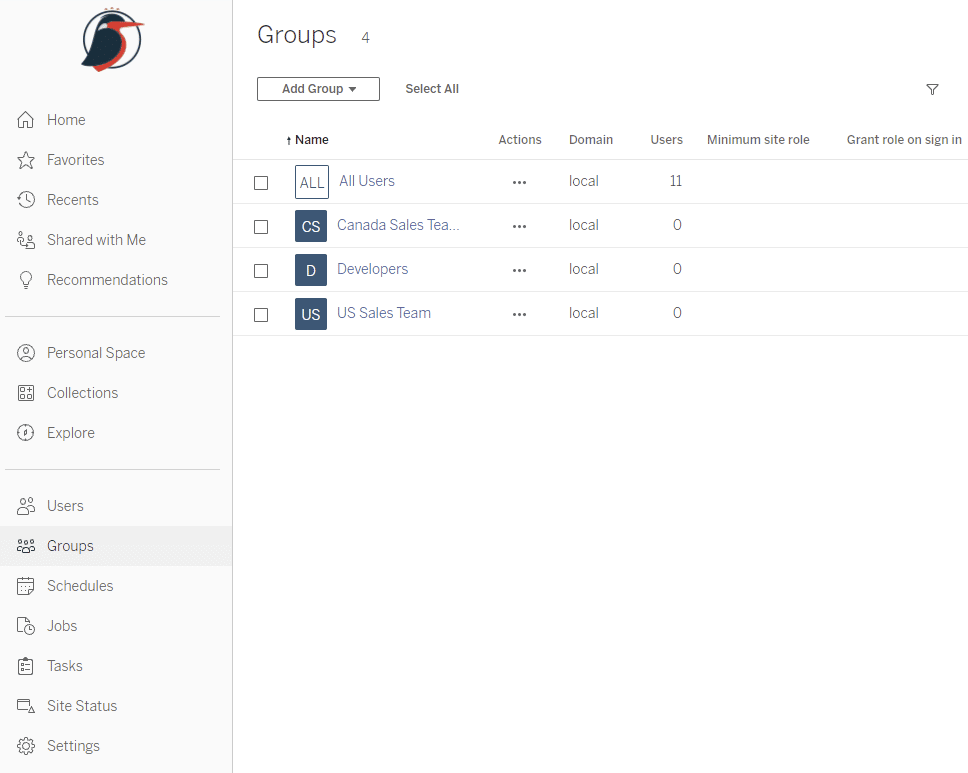
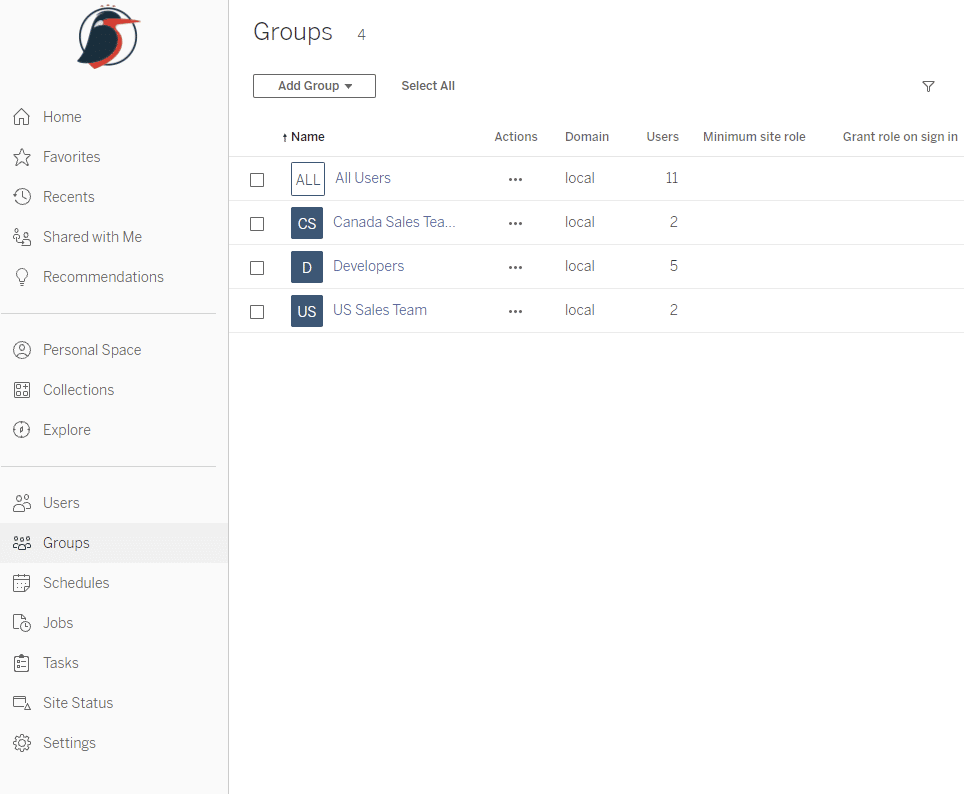
Let’s cover the basics first, I am going to switch gears and go into Tableau Server to create a few groups. I will log in to my portal then select Groups from the left-hand pane.

We can see that I currently have no groups set up. My use case is going to call for three groups (Canada Sales Team, US Sales Team, and Developers). To create a group, I will click Add Group from the top and give the group a name. I am going to go ahead and create all three groups.
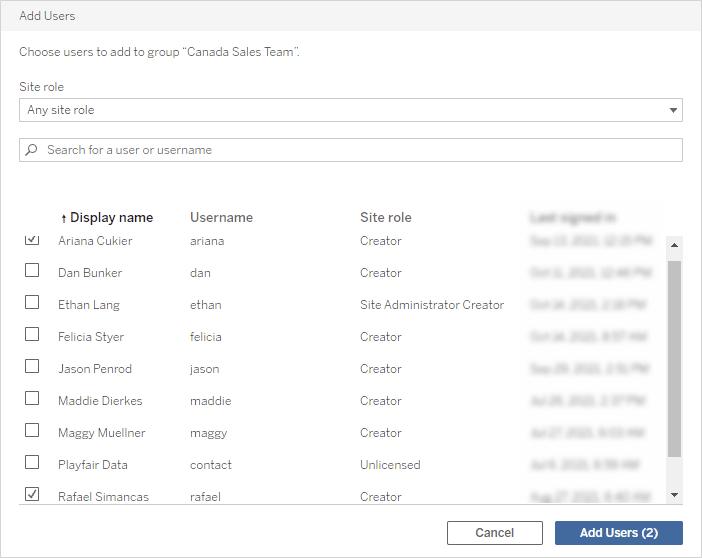
We can see the groups show up but no users have been assigned to them yet. Let’s add the Canada Sales Team into their group. I will click that group then select Add Users at the top left.
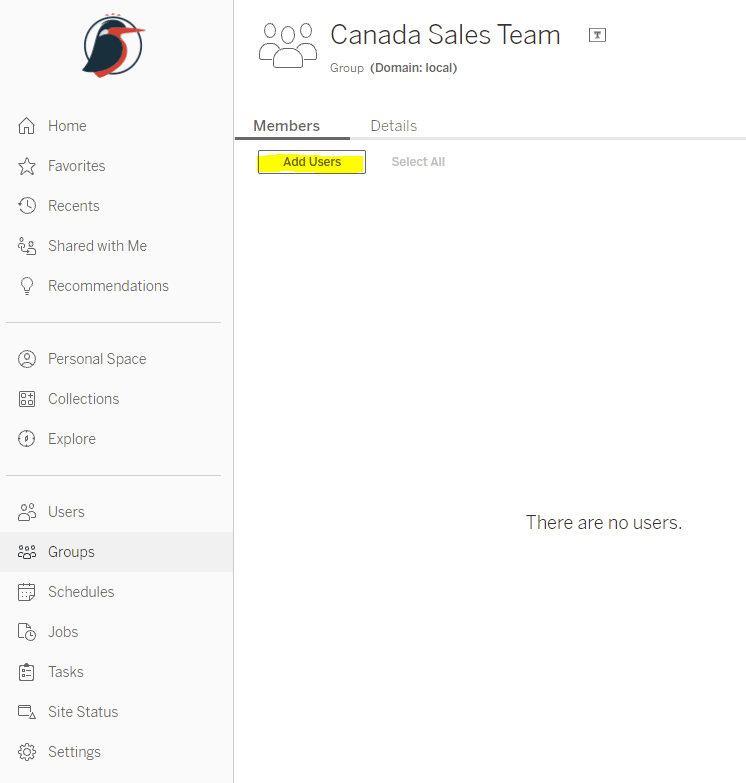
When I do, an Add Users pane will appear and I will select Ariana and Rafael from the list of users then click Add Users (2).
I will take the same steps for the US Sales Team and the Developers groups.
Now that we have our users defined, I will jump back into Tableau Desktop to implement row-level security using Groups.
Following the same steps as before I will click Server in the top navigation, hover over Create User Filter, and select Order ID. We will see the User Filter selection appear and we will see our new groups on the left side of the pane.
We will assign the dimension members to our groups just like we did for our individual users. I will start with the Canada Sales Team group by clicking on it and then clicking the Find button. I will select the Starts With radio button, enter CA, and click Find. Then I will click All to select all of those dimension members and then click OK.
For the developer group, I will select it then choose all the dimension members and for the US group, I will follow the same steps except I will search for US instead of CA. Once I have my other groups setup I will name this user filter the Sales Team Group Filter, and click OK.
In Tableau Desktop I should now be able to replace my current user filter with my new group filter and everything should stay the same. Let’s try it out.
I can see with myself selected nothing happened which is what we would expect. If I choose Ariana from the drop-down at the bottom right, we should see only CA Order IDs.

Looks like that is working. Next, let’s select Jason from the US sales team.
Looking good. As the last test, I left Dan out of my groups when I created them in Tableau Server. With that said we should be able to select him as the user and everything should go blank just like before.

That is exactly what we see. Looks like everything is working and we are ready to publish.
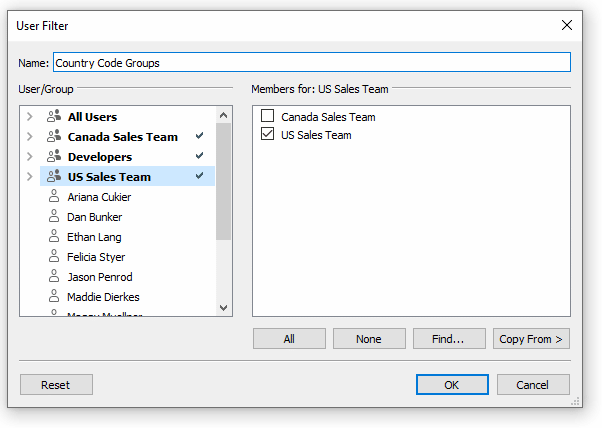
How to make dynamic row-level security in Tableau
In the last few sections I have demonstrated how to set up row-level security but I implemented it on single values so you could see it working one for one. However, with the current implementation if new data was loaded we would have to manually update those filters.
![]()
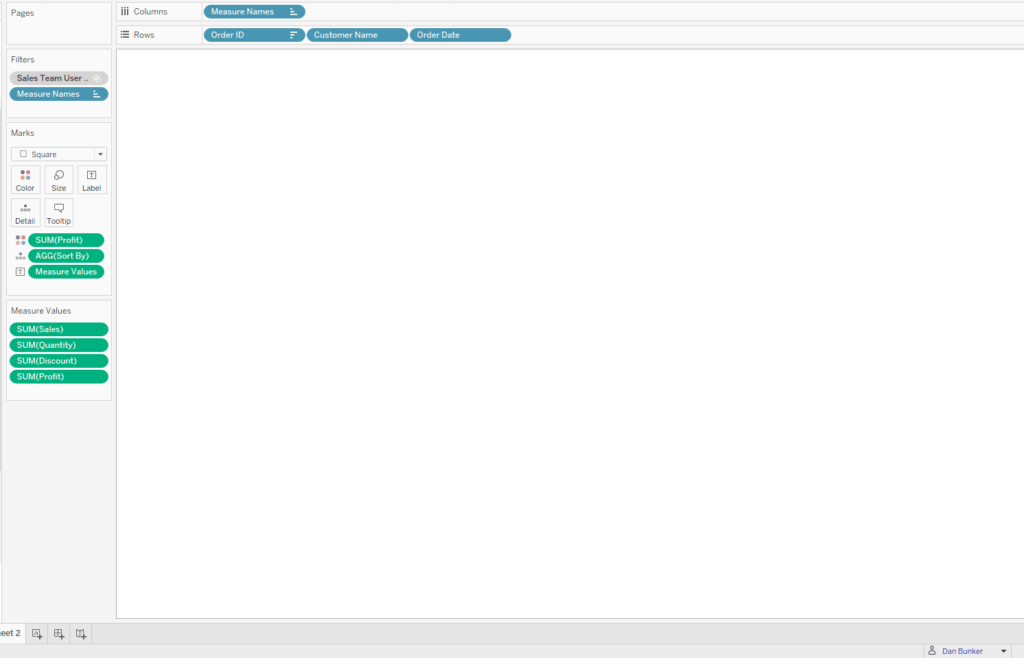
To make this solution dynamic we first have to create a calculated field with the same logic we were using when creating the User Filters (Choosing Find and searching for orders that start with CA or US). To do this I will right-click anywhere in any blank space in the Data pane, choose Create, then Create a Calculated Field. Then I will enter the following calculation and click OK.
IF LEFT([Order ID],2) = “CA” THEN “Canada Sales Team”
ELSEIF LEFT([Order ID],2) = “US” THEN “US Sales Team”
END
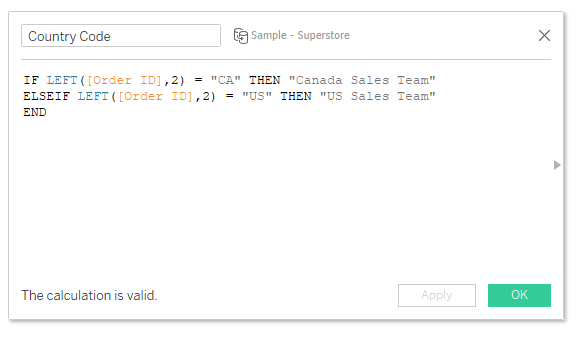
Now I will walk through similar steps as before except when I choose a dimension for the User Filter I will choose this new calculated field I labeled “Country Code”.
We will see the same dialog box as before prompting us to choose our user and select what data they have access to. I will select my Canada Sales Team group from the left then choose the corresponding value from the right. I will do this for both the US and CA sales teams as well as my developer group who should see all the data.
Now I will click OK and drag this new field to the Filters shelf on top of my current user filter. We won’t see anything change. However; if we got new orders the next time the data was refreshed those orders would come in and be included in our row-level security.
I do want to stress the importance of this technique. Without setting up row-level security in Tableau this way our options would be creating two separate dashboards with two separate datasets. If we had five sales teams or a hundred you can see where I am going there. We just reduced the technical debt significantly. More importantly, you are keeping your data safe and secure.
Until next time,
Ethan Lang
Director, Analytics Engineering
[email protected]

Written By
Ethan Lang

Peer Review
Maddie Dierkes
Manager, Decision Science

Peer Review
Maggy Muellner
Sr. Visual Analytics Associate
Related Content
How to Implement Column-Level Security in Tableau
In the first part of this two-part series, I introduced How to Implement Row-Level Security in Tableau. This method is…
A Quick Start Guide to Tableau Prep

In this tutorial, we’ll be covering the Tableau Prep tool and how we can use it to build out data…
Triple Crown Framework for Data Visualization: Data

This is the third in a series of four posts about my newest strategic framework for data visualization. For previous…